How to Create New Linux VM in OpenStack Dashboard Horizon on EO-Lab
First, navigate to Project → Compute → Instances.
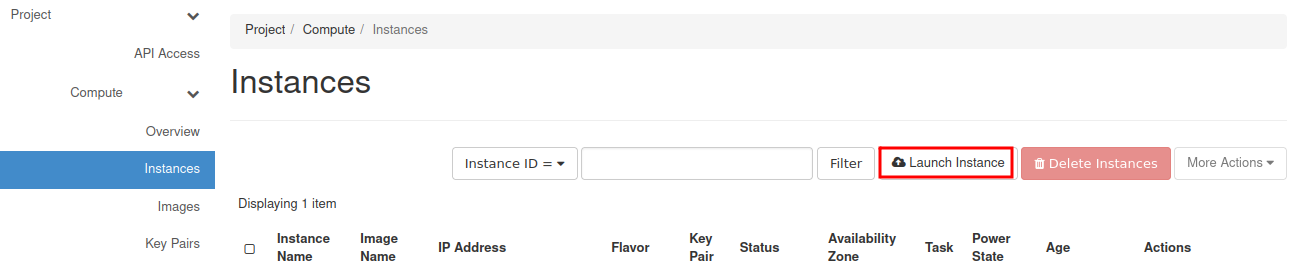
Next, click on “Launch Instance”.
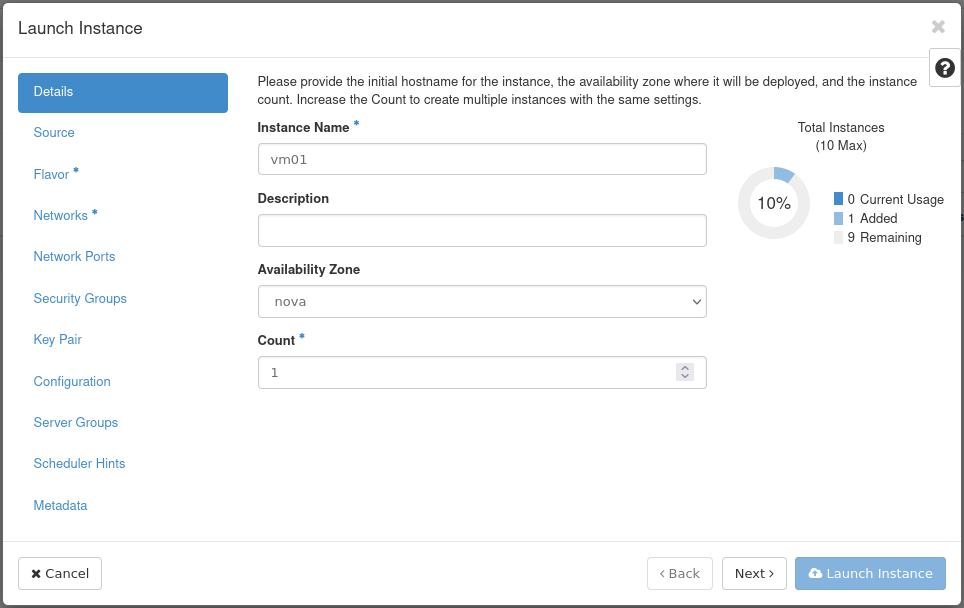
Insert the name for the Instance (eg. “vm01”) and click Next button.
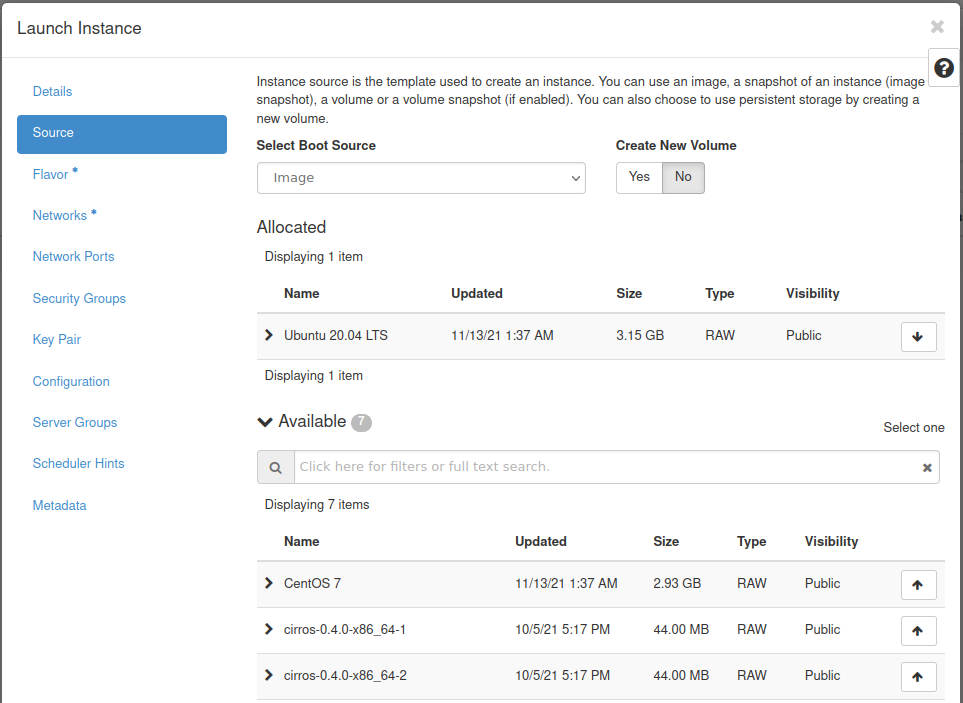
Select a Boot Source for the instance (e.g. “Image”), and choose the desired image (eg. “Ubuntu 20.04 LTS”) by clicking on the up arrow.
Note
If you do not need to have the system disk bigger than the size defined in a chosen flavor, we recommend setting the “Create New Volume” option to “No”.
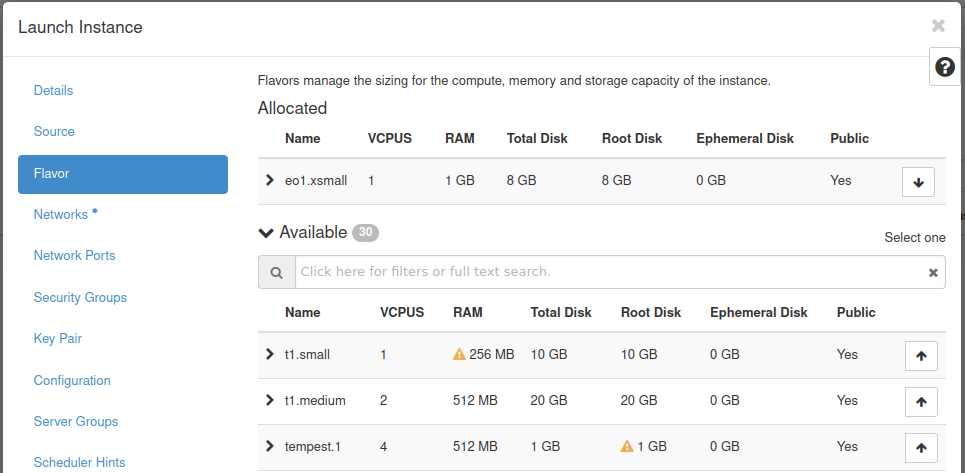
Choose Flavor (eg. eo1.xsmall).
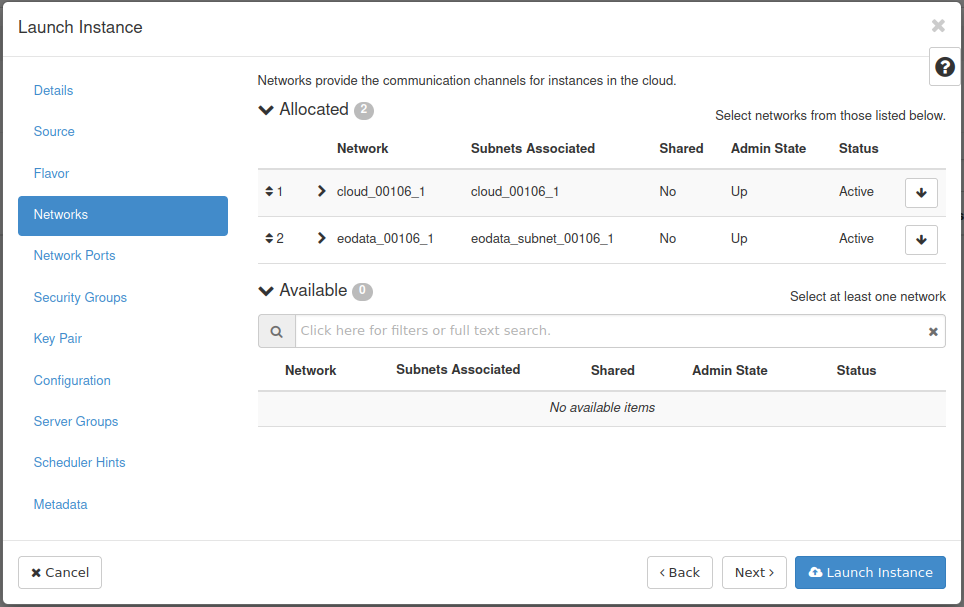
Click “Networks” and then choose all desired networks.
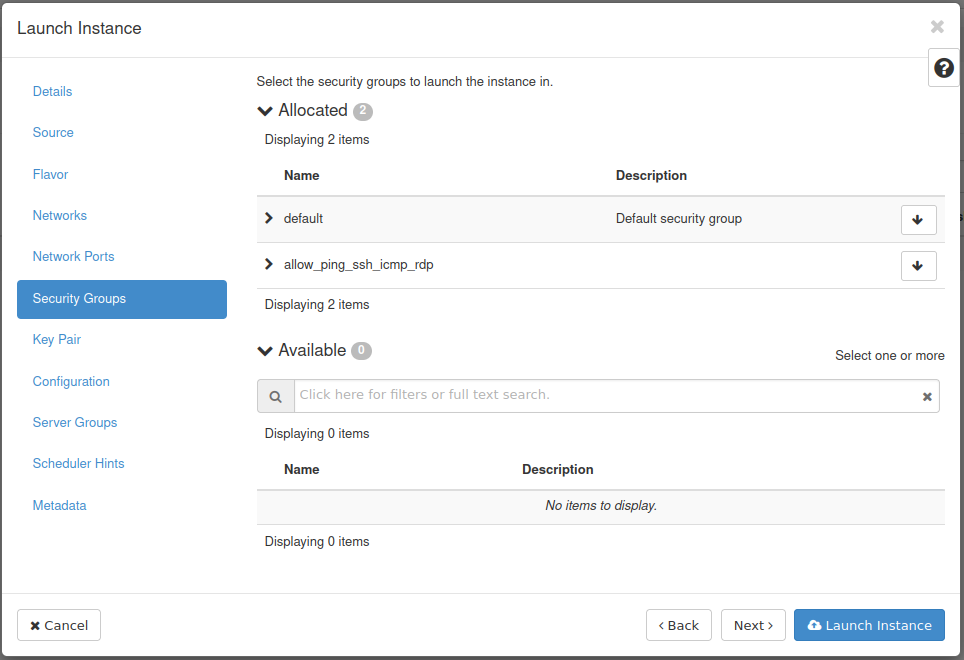
Open “Security Groups”. Next, choose the “default” and “allow_ping_ssh_icmp_rdp” groups.
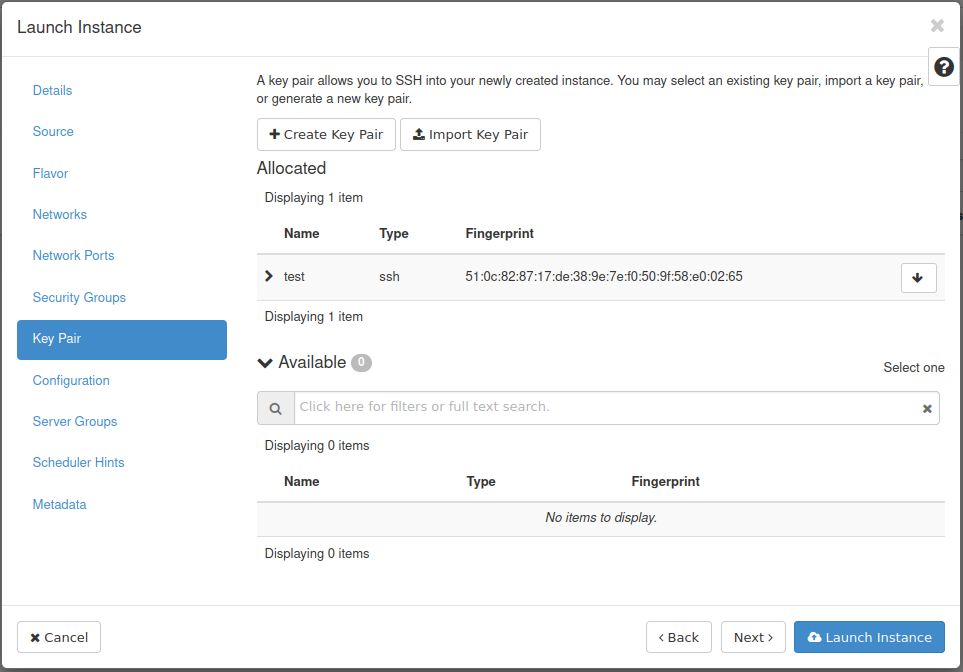
Next, choose or generate an SSH keypair and then launch your instance by clicking on the blue button.
More information on creating a keypair can be found in this article: How to Create Key Pair in OpenStack Dashboard on EO-Lab.
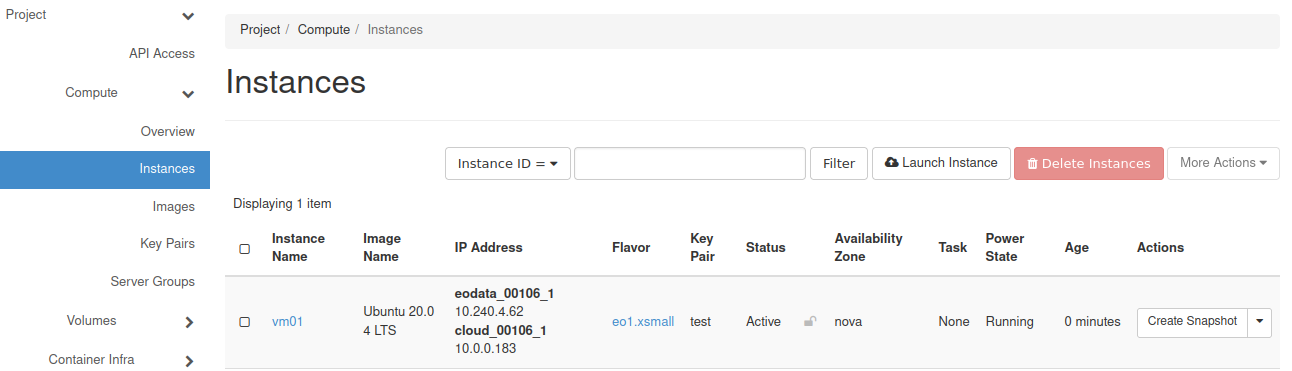
You will see “Instances” menu with your newly created VM.
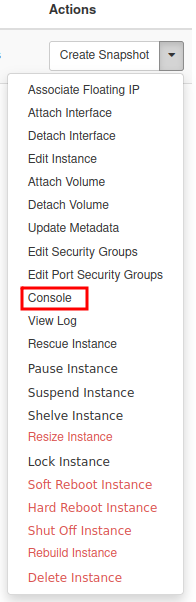
Open the drop-down menu and choose “Console”.
Click on the black terminal area (to activate access to the console). Type: eoconsole and hit Enter.

Insert and retype new password.

Now you can type commands.
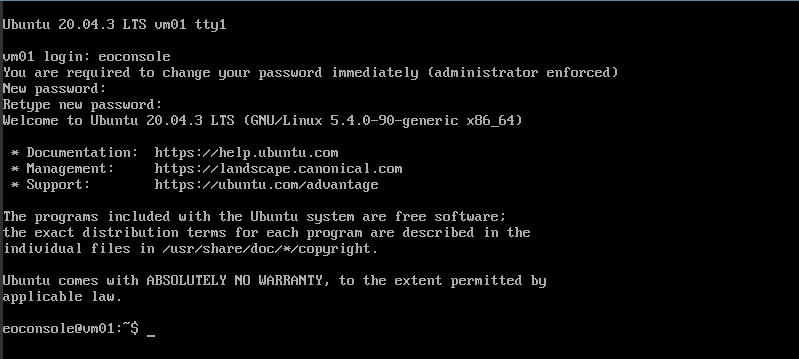
After you finish, type “exit”.

This will close the session.
If you want to make your VM accessible from the Internet check How to add or remove Floating IPs to your VM on EO-Lab.