How to upload your custom image using OpenStack CLI on EO-Lab
In order to add custom OS images to your cloud resources you will use the python-openstackclient CLI (command line interface).
Should you need help with the installation, please refer to this guide: How to install OpenStackClient for Linux on EO-Lab
It is strongly recommended to use virtual environments to avoid installing wide-spread Python packages.
Here is some information on how to use Python with the Virtualenv configuration: How to install Python virtualenv or virtualenvwrapper on EO-Lab.
You may also use pipenv or miniconda to create a virtual environment for your Python programs.
Step 1 Prepare a working environment
If you have already prepared a working environment, open your terminal window now.
Step 2 Authenticate your computer to the OpenStack cloud
Download the file test-openrc.sh from your Horizon dashboard and use the source command on it. It will ask for your password (use the same password you used to log into the Horizon interface).
cd cloud_test/
source test-openrc.sh
Please enter your OpenStack Password for project test as user johndoe:
Note
In the following, we are using file custom_image.qcow2. The format qcow2 is a special format for operating systems images.
The custom_image.qcow2 is not a part of the Horizon dashboard. There is a special repository for OpenStack OS images called Glance. You can download a qcow2 type of image from there.
Step 3 Upload OS Image to Glance
Use command openstack image create to upload the image to Glance:
openstack image create --disk-format qcow2 --container-format bare \

--private --file ./custom_image.qcow2
Use help to see all available commands:
openstack image create --help
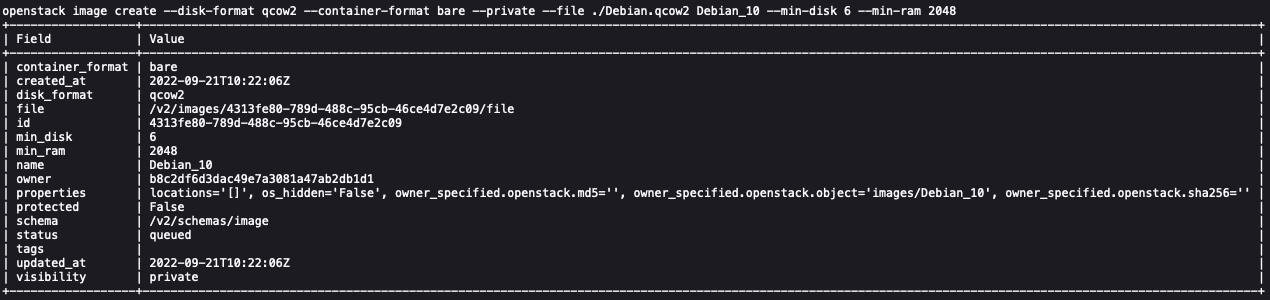
Here is an example of how you could upload the Debian 10 operating system and the output that will be shown on screen:
openstack image create --disk-format qcow2 --container-format bare --private --file ./Debian.qcow2 Debian_10 --min-disk 6 --min-ram 2048
Step 4 Check your new image
Log into https://cloud.fra1-1.cloudferro.com/auth/login/?next=/ and check whether your new image has been uploaded.
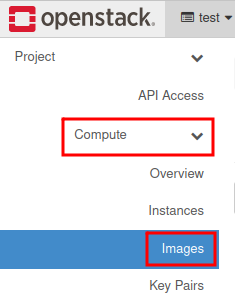
Step 5 Check available images using Horizon commands
Navigate to Compute → Images
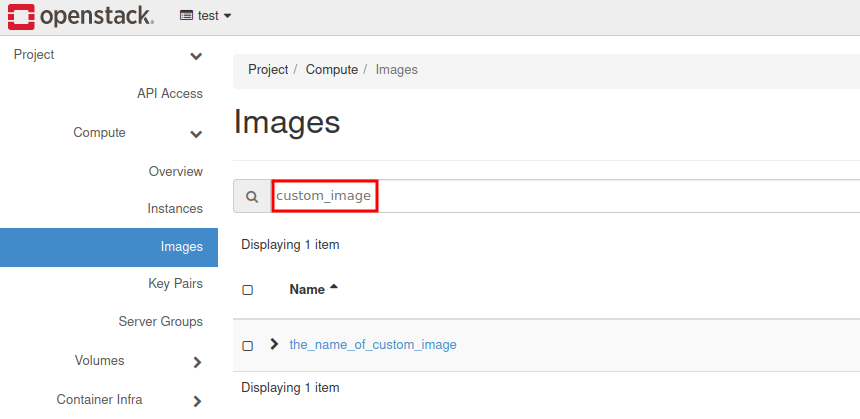
Step 6 Filter the images
For this example, we will use the filter custom_image:
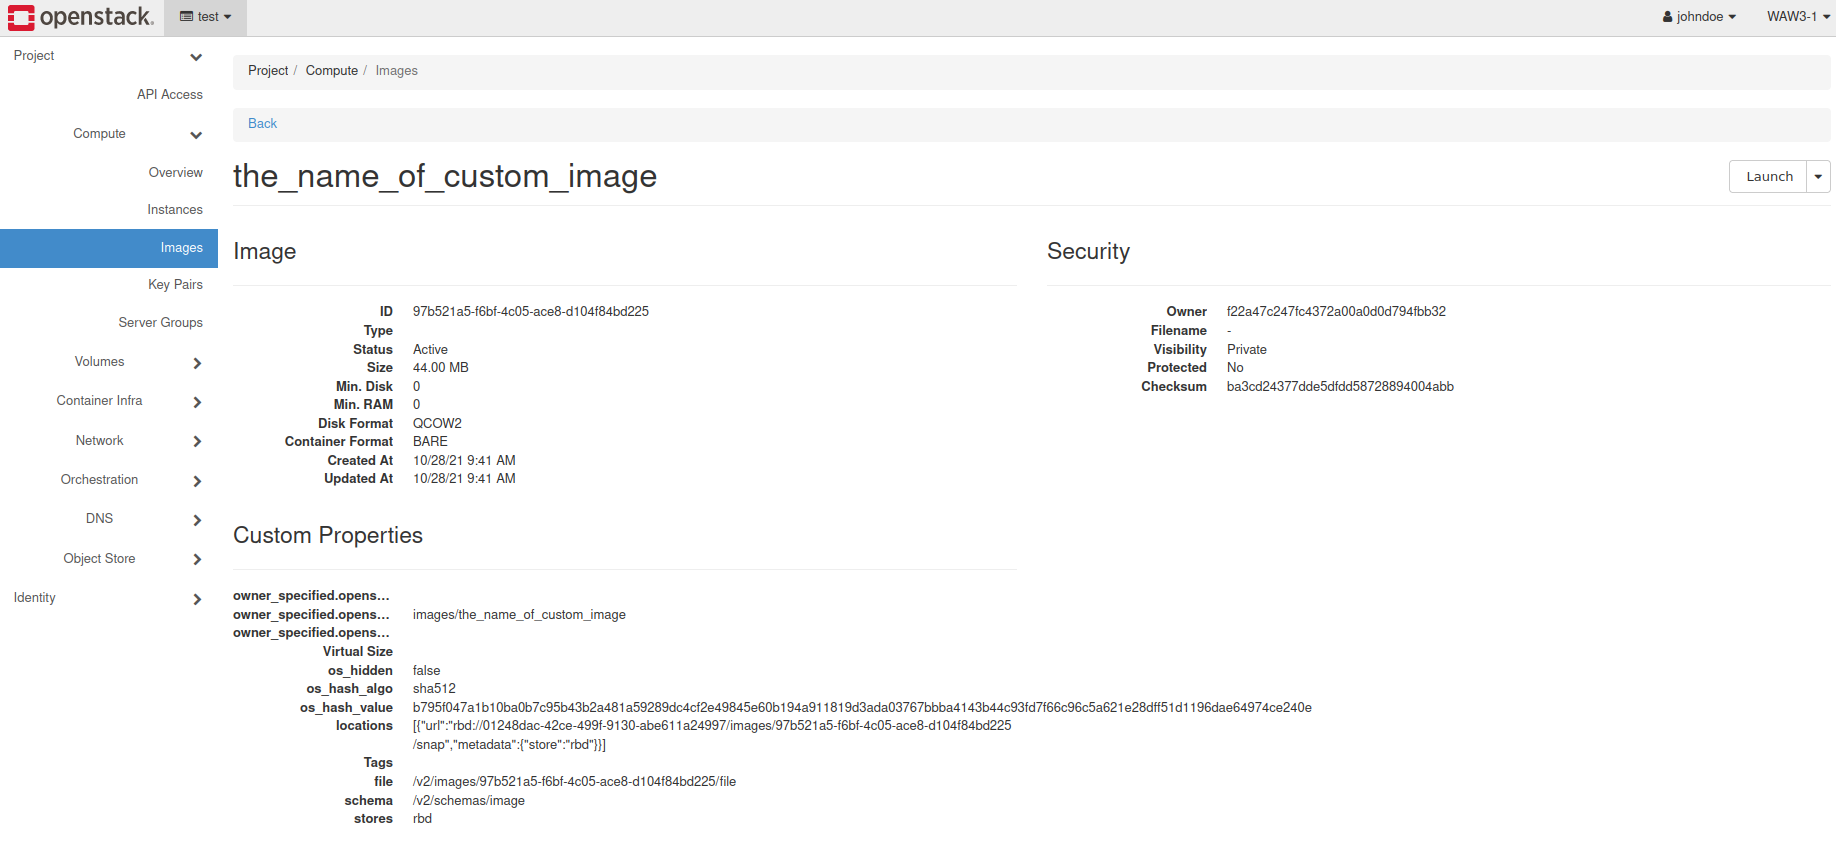
Step 7 Advanced image data
Click on the image to inspect its advanced data: