How to Create a Volume Backup from a Windows VM?
Volume Backups provide additional security and are stored in a different location than Volume Snapshots.
Note
The Volume Backup is non-incremental and will overwrite every data that was written to the volume after backup creation. Your current volume will be replaced by the backup data.
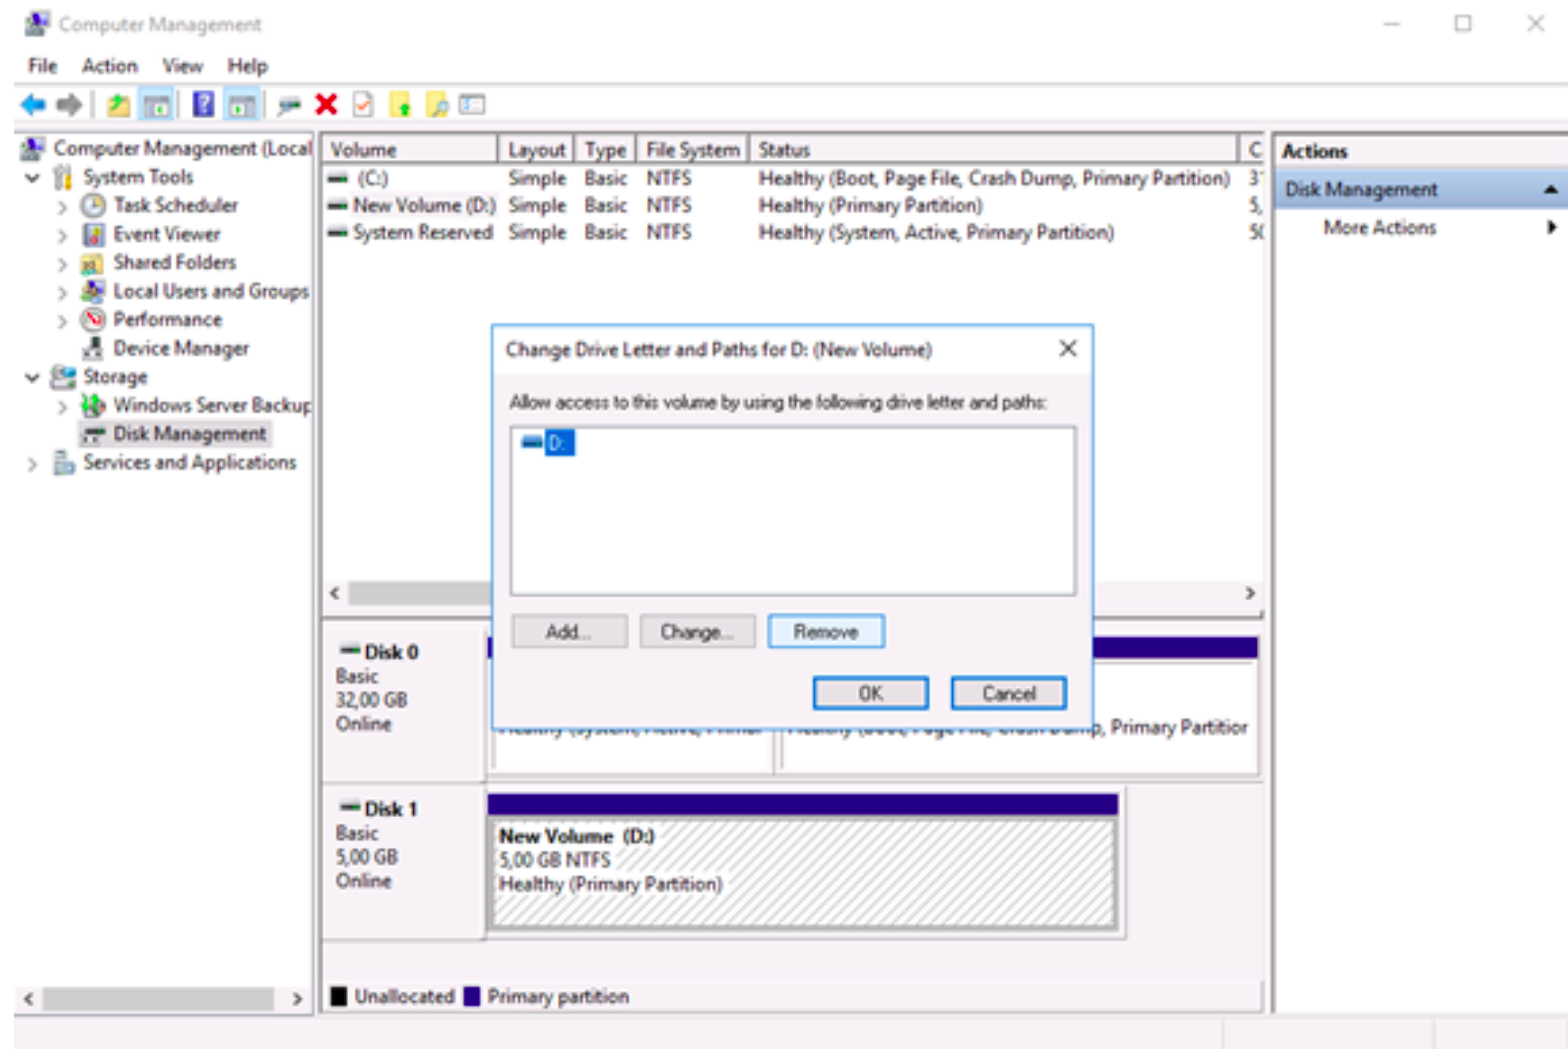
To create a backup of your volume you first need to unassign it in the Windows VM. Open “Administrative Tools” -> “Computer Management” -> “Disk Management” in your Windows VM. Right click on desired disk, choose “Change drive letter”, and select “Remove”.
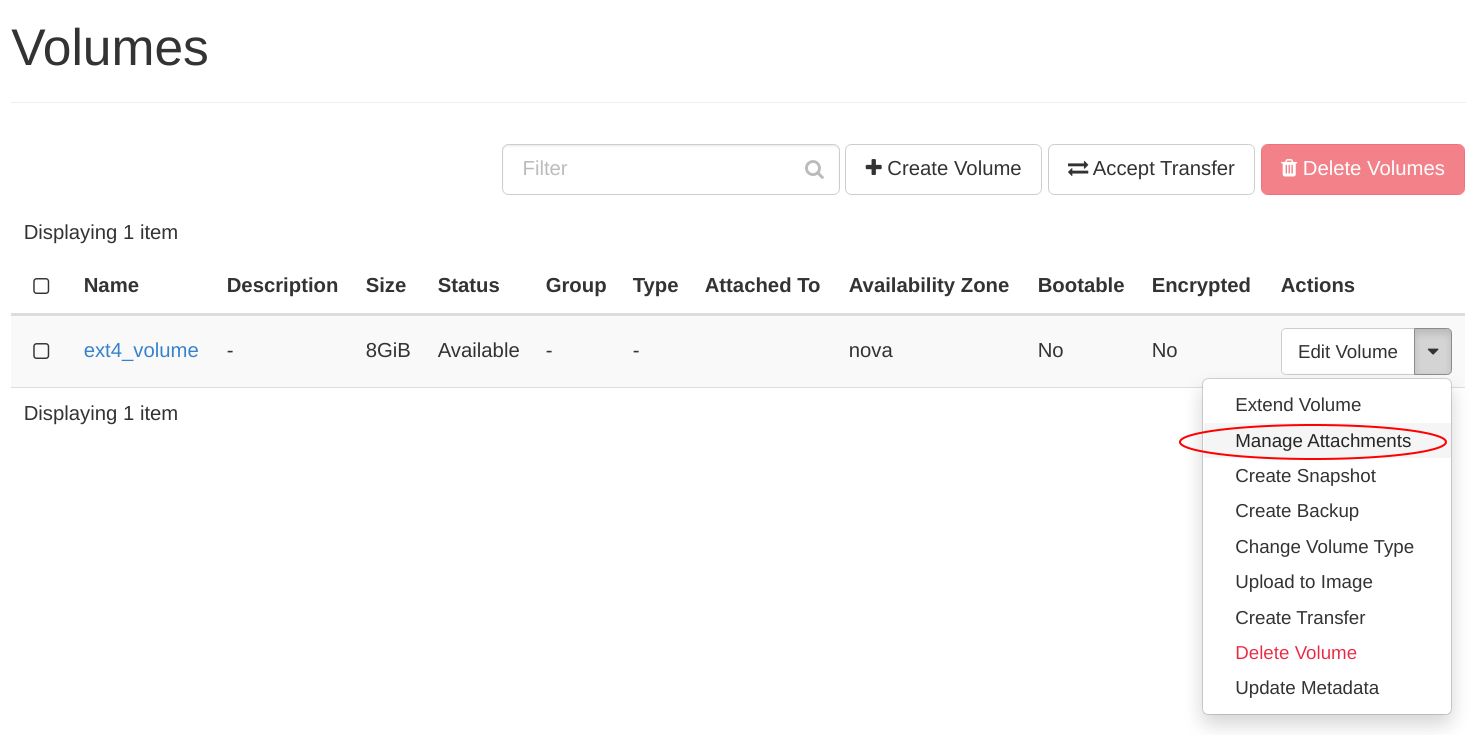
Next step is to detach the volume in Horizon (OpenStack Dashboard). Go to “Volumes” and choose “Manage Attachments” from the scroll down menu.
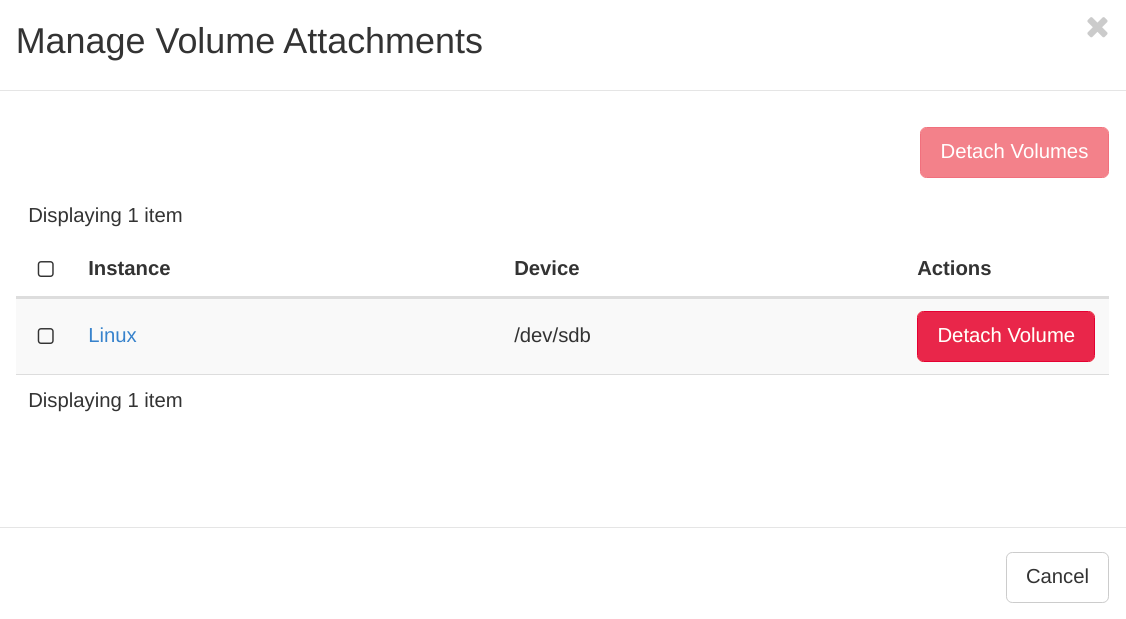
Then detach your volume by clicking on “Detach Volume”.
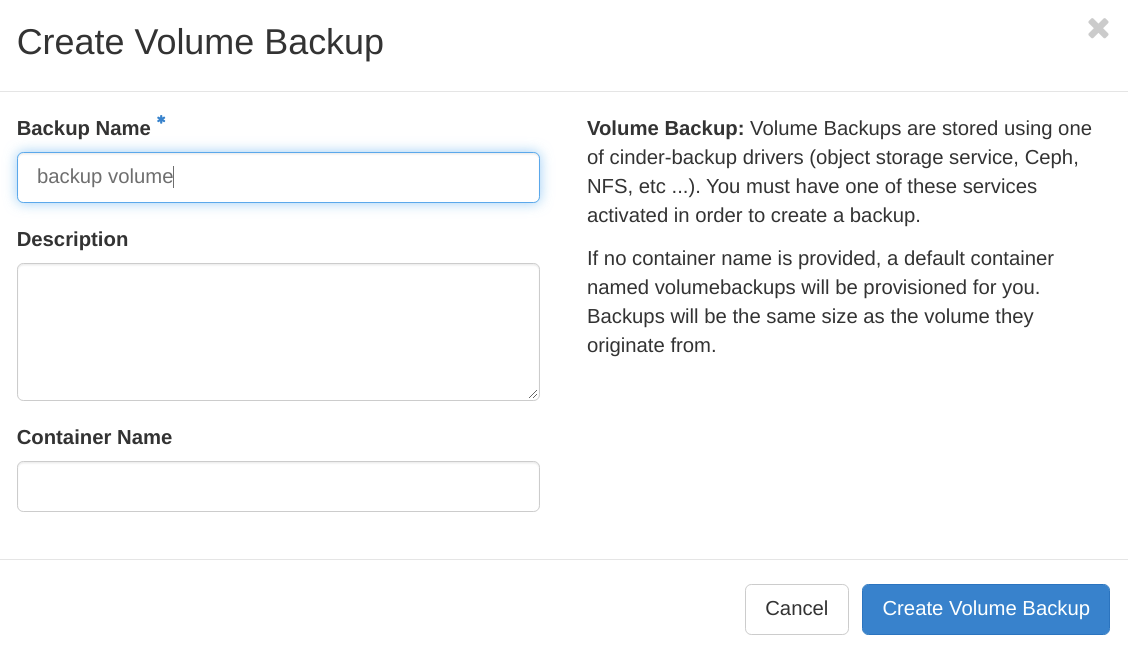
Go to the Horizon menu “Volumes” -> “Edit Volume” -> “Create Backup”

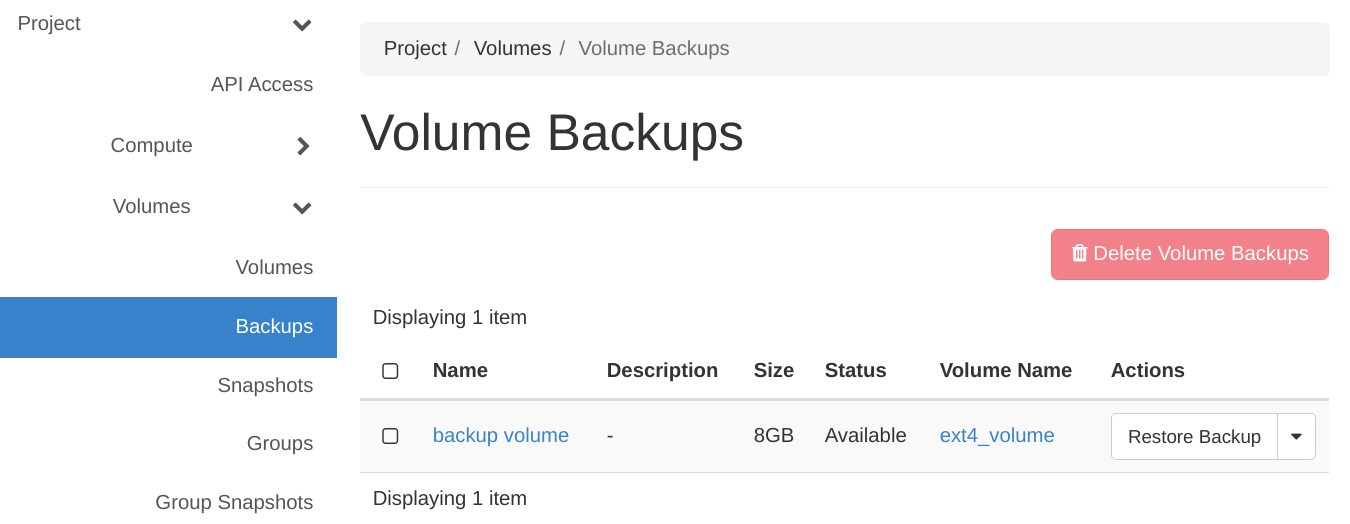
After creating a backup you will see it listed in Volume Backups menu:
How to Restore the Backup
Before restoring a Volume Backup the volume should be unassigned in Windows and detached in “Volume” menu in Horizon – see above. The Volume Backup is non-incremental and will overwrite every data that was written to the Volume after backup creation. Your current volume will be replaced by the backup data.
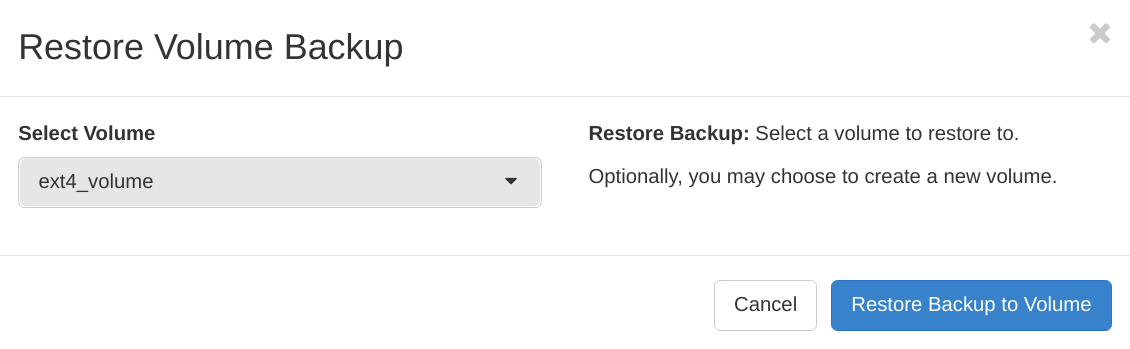
To restore the backup choose the option “Restore Backup” and confirm:
After restoring the Volume attach it again to your VM and assign a drive letter.