How to Access Sen4CAP
1. Create Your Account
To register a new account on the EO-Lab platform, please go to https://EO-Lab.org/en/ and use the LOGIN button on the top right.

2. Switch to OpenStack Dashboard
To create a new VM you need to go to the OpenStack Dashboard.
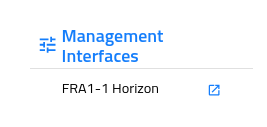
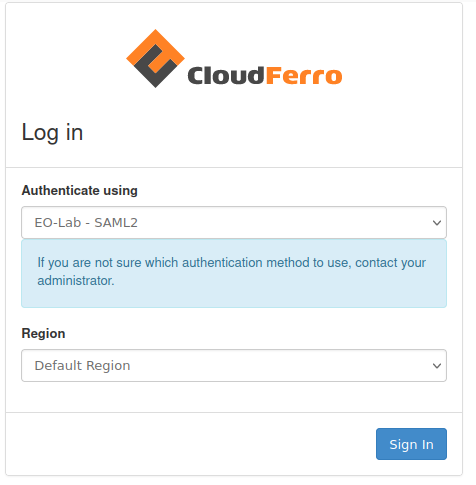
After logging in to the newly created account, go to https://cloud.fra1-1.cloudferro.com/auth/login/?next=/ either directly or by clicking on the following link in the bottom left
and login using the following authentication method:
3. Instance creation
To use Sen4CAP you must first create a VM that supports Sen4CAP in a project with access to EOData (dlr-access-net).
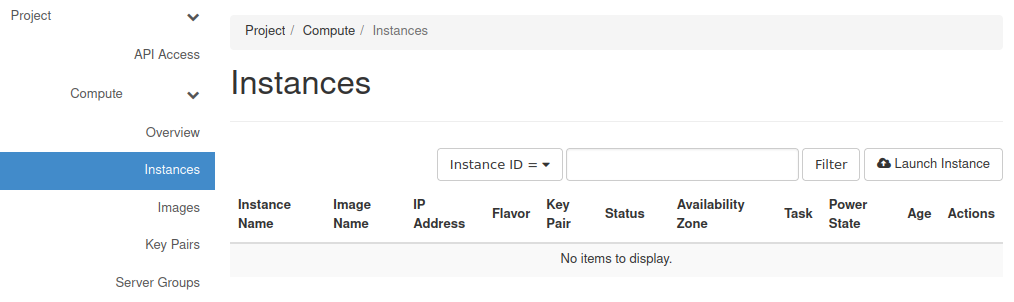
To do this, go to Project → Compute → Instances and click the Launch Instance button.
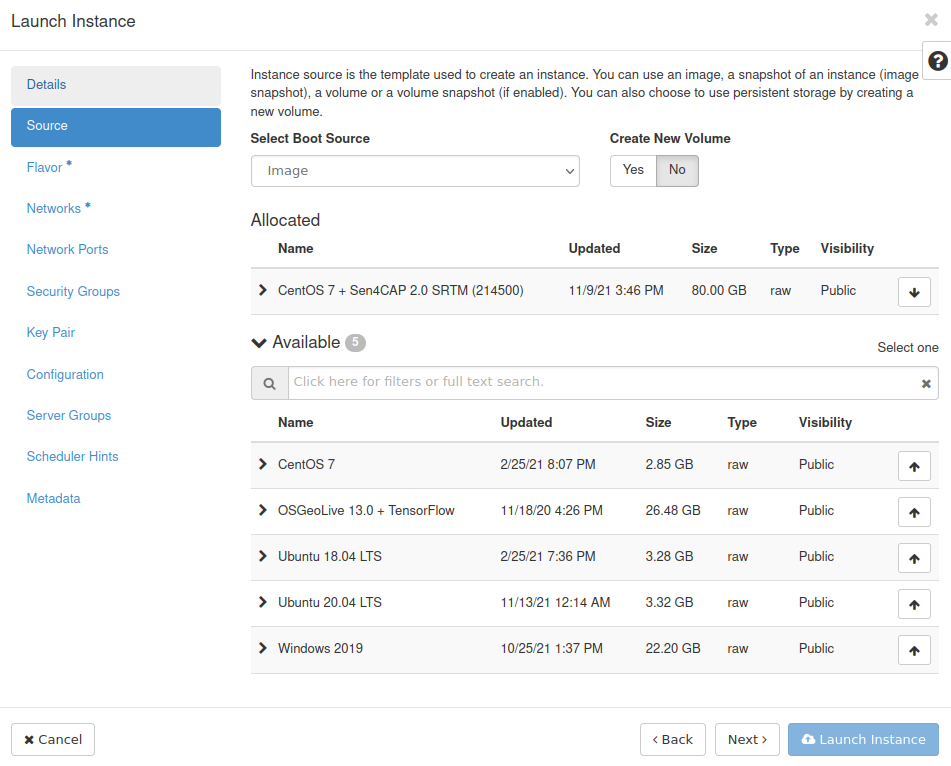
In the now opening window for creating a new instance, select the image CentOS 7 + Sen4CAP from the Source tab by pressing the arrow button.
We recommend selecting the No option when choosing whether to Create New Volume.
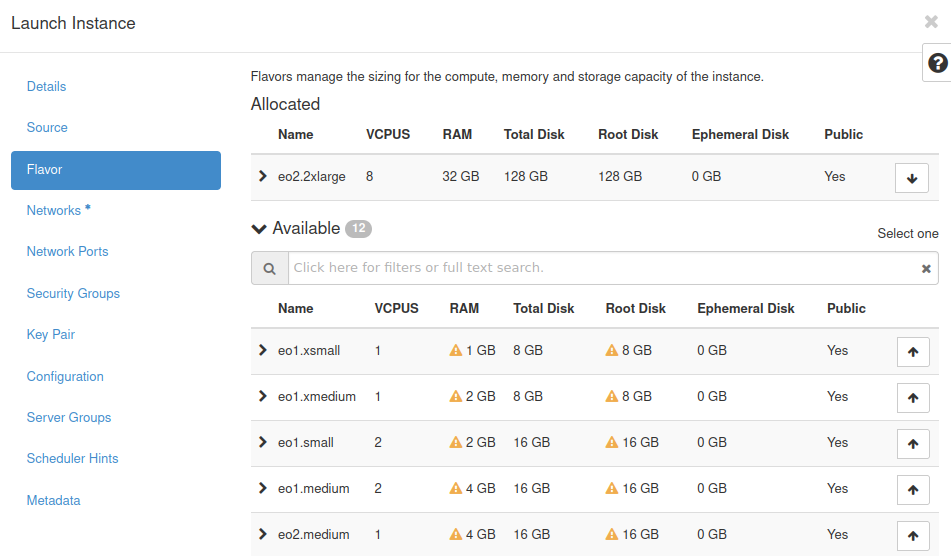
Due to the large image size, the minimum available flavor to run the machine is hm.large. Choose this or a more powerful Flavor in the corresponding tab by pressing the arrow button next to it.
Triangular warning signs mean that the flavor is not powerful enough to run the machine with the selected image.
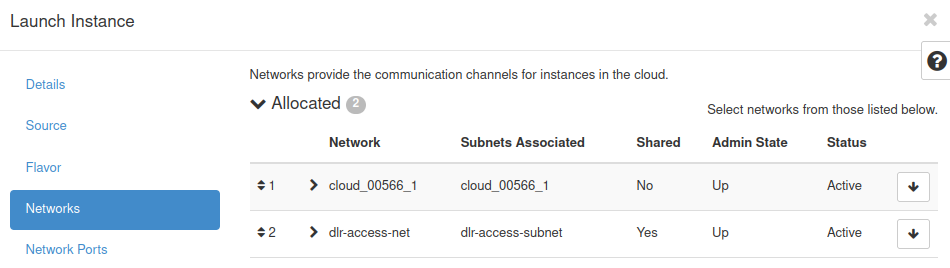
In the Networks tab, select your private network and dlr-access-net.
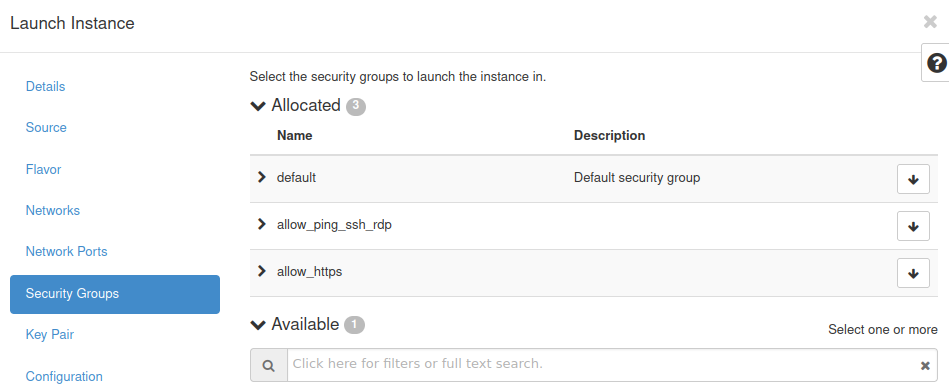
In the Security Groups tab, add the already existing group allow_ping_ssh_rdp as well as the group that will allow incoming HTTPS traffic on port 443 (for Sen4CAP 2.0 SRTM) or port 8080 (for Sen4CAP 3.1 SRTM) e.g. allow_https.
If you do not have such a security group, click here to learn more How to use Security Groups in Horizon on EO-Lab
In the rule you can specify which IP address or addresses should have HTTPS access.
We suggest that you create rules for trusted IP addresses.
Remember to add your public key in the Key Pair tab or create a new one after clicking ton he Create Key Pair button.
After entering the required information, click on the Launch Instance button.
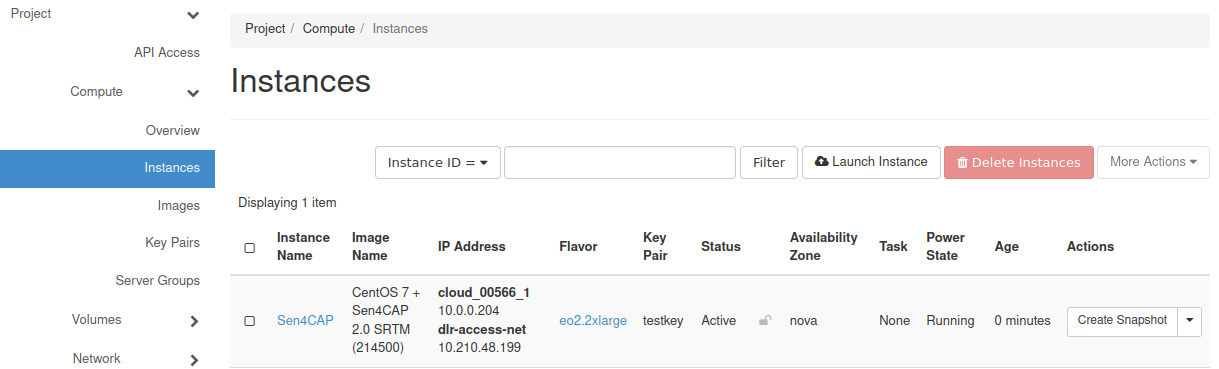
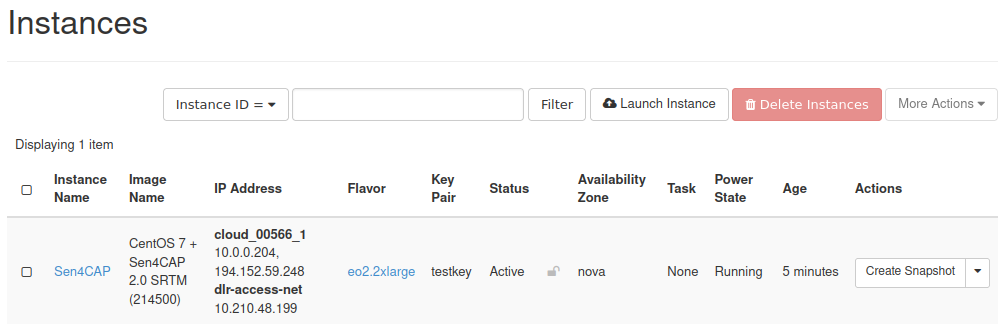
The newly created instance should be visible in Project → Compute → Instances.
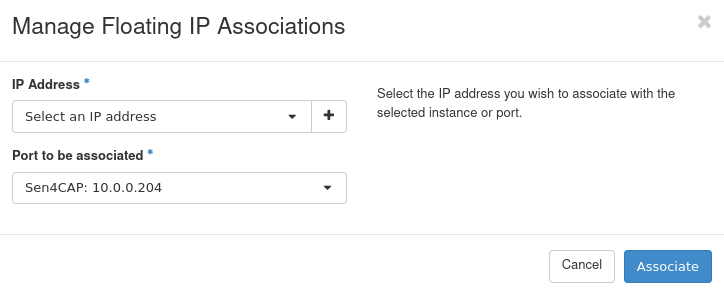
Select the Associate Floating IP option from the dropdown menu in the “Action” column. A window with the option of adding Floating IP will be shown.
Select the already assigned Floating IP or add a new one from the pool by using the plus button. Please make sure to assign the Floating IP to your private network address.
Lastly, click the Associate button.
You can check the attached Floating IP address in Project → Compute → Instances. An Floating IP address is required to access Sen4CAP.
4. Access to Sen4CAP
Sen4CAP will be available to use with a browser.
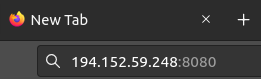
Open your browser and enter the IP adress you assigned to the VM. You can copy your machine address (Floating IP) from Project → Compute → Instances (in the example above it would be 194.152.59.248).
https://<Floating IP>

If connecting to an installation of sen4CAP version 3.1, please type the following address instead:
<Floating IP>:8080
If you’re using a Chrome browser, you’ll need to install the needed certificate.
5. First login
After loading the page, you should see the Sen4CAP banner

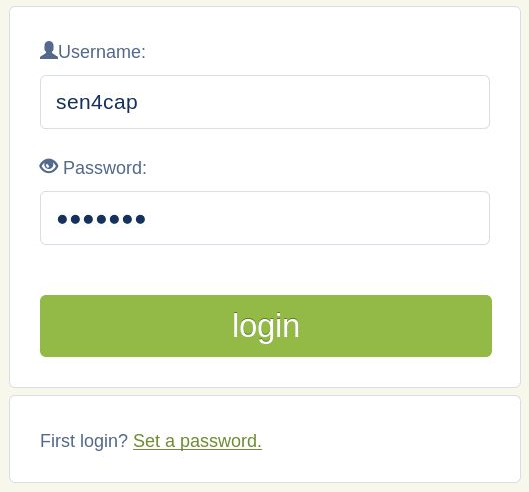
and will be redirected to the login page.
The default username and password are as follows:
Username: sen4cap
Password: sen4cap
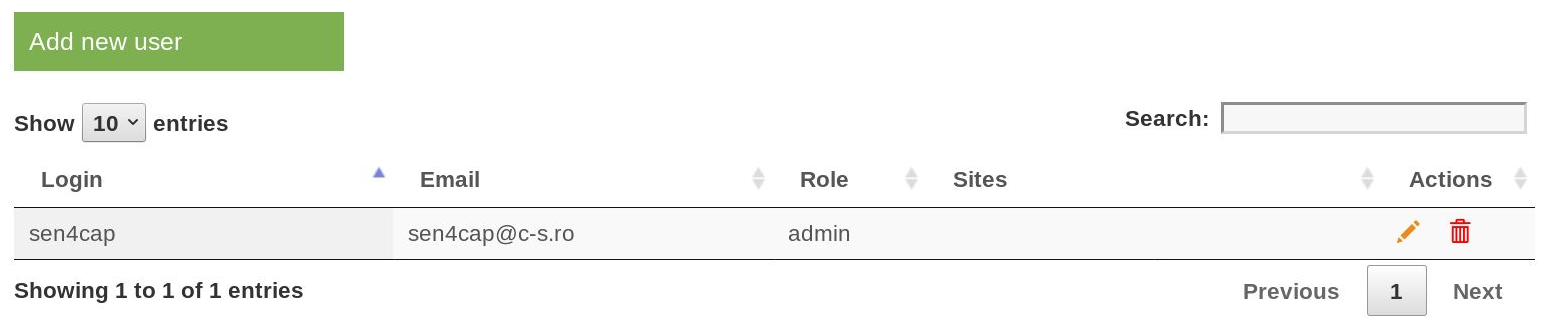
At this point you will likely want to create user accounts. To do this, navigate to the users tab.

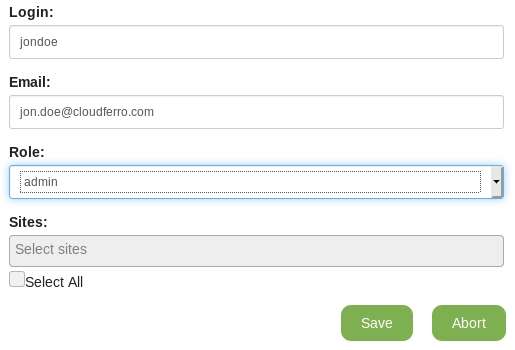
Click on the Add new user button to create a new user.
Create a new user with administrator role, and press Save button.
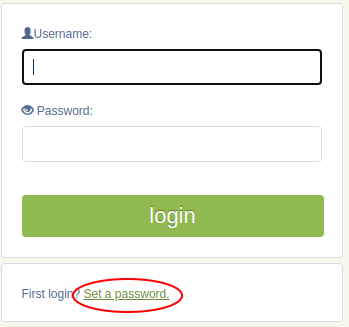
After creating a new user, press the logout button on the top bar.
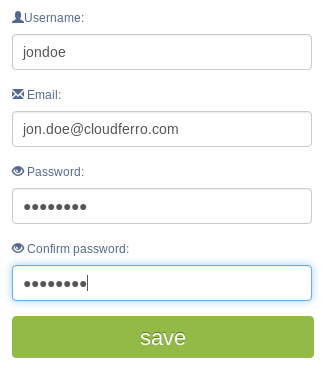
You will be redirected back to the login screen, but this time click on the Set a password link.
If you want to create a password for a newly created user, enter a new password and click on save.
After successfully logging in, go to the users tab and remove the user sen4cap by using the trash can button next to that user.

Sen4CAP is now ready for use.