How to activate OpenStack CLI access to EO-Lab cloud
Cloud parameters for authentication and, later, OpenStack CLI access, are found in a so-called RC file. This article will help you download and use it to first authenticate and then access the cloud using OpenStack CLI commands.
What We Are Going To Cover
How to download the RC file
Adjusting the name of the downloaded RC file
The contents of the downloaded RC file
How to activate the downloaded RC file
Authentication
Testing the connection
Resolving errors
Prerequisites
No. 1 Account
You need a EO-Lab hosting account with access to the Horizon interface: https://cloud.fra1-1.cloudferro.com/auth/login/?next=/.
No. 2 OpenStackClient installed and available
Installing OpenStackClient on various platforms will also install the ability to run the .sh files. Since OpenStack is written in Python, it is recommended to use a dedicated virtual environment for the rest of this article.
- Install GitBash on Windows
Run .sh files and install OpenStackClient from a GitBash window under Windows: How to install OpenStackClient GitBash for Windows on EO-Lab.
- Install and run WSL (Linux under Windows)
Run .sh files and install OpenStackClient from a Ubuntu window under Windows. How to install OpenStackClient on Windows using Windows Subsystem for Linux on EO-Lab OpenStack Hosting.
- Install OpenStackClient on Linux
Find link to download the RC file
You can download the RC file from two sections of the Horizon dashboard:
- Method 1: Click on account name
Top right corner of the Horizon screen contains the account name. Click on it and a menu like this will appear:
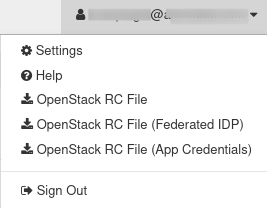
Options Settings and Help are out of scope of this article.
- Method 2: API Access
Navigate to API Access -> Download OpenStack RC File. You will see a menu like this:
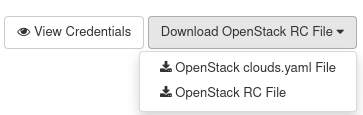
Option OpenStack clouds.yaml File is out of scope of this article.
Which OpenStack RC file to download
Choose the appropriate option. For cloud FRA1-1, it is OpenStack RC File.
You only need one copy of the RC file at any time. If you downloaded more than one copy of the file to the same folder without moving or renaming them, your operating system may differentiate amongst the downloaded files by adding additional characters at the end of the file name.
By way of example, let the downloaded RC file name be cloud_00734_1-openrc-2fa.sh. For your convenience, you may want to
rename it and
move to the folder in which you are going to activate it.
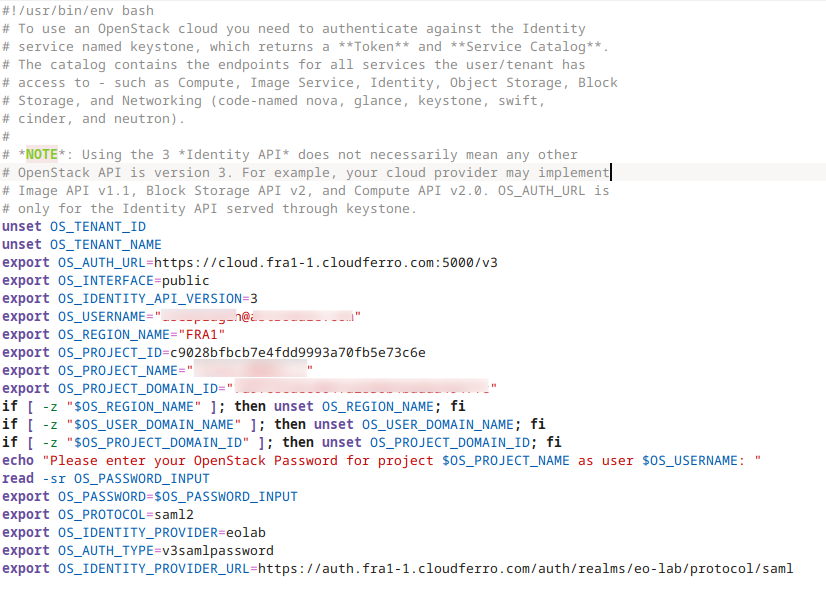
The contents of the downloaded RC file
RC file sets up environment variables which are used by the OpenStack CLI client to authenticate to the cloud. By convention, these variables are in upper case and start with OS_: OS_TENANT_ID, OS_PROJECT_NAME etc. For example, the RC file will ask for password and store it into a variable called OS_PASSWORD.
Here is an example content of an RC file:
How to activate the downloaded RC file
The activation procedure will depend on the operating system you are working with:
- Ubuntu
Assuming you are in the same folder in which the RC file is present, use the source command:
source ./cloud_00734_1-openrc-2fa.sh
- macOS
The same source command should work on macOS. In some versions of macOS though, an alternative command zsh could serve as well:
zsh ./cloud_00734_1-openrc-2fa.sh
Note that in both cases ./ means “use the file in this very folder you already are in”.
- Windows
On Windows, to execute file with .sh extension, you must have an installed application that can run Bash files.
See Prerequisite No. 3, which describes in more detail how to run .sh files using various scenarios on Windows.
Running the authentication
The activated .sh file will run in a Terminal window (user name is grayed out for privacy reasons):

Enter the password, either by typing it in or by pasting it in the way your terminal supports it, and press Enter on the keyboard. The password will not be visible on the screen.
This is all you need to do to start running commands from command line.
Duration of life for environment variables set by sourcing the RC file
When you source the file, environment variables are set for your current shell. To prove it, open two terminal windows, source the RC file in one of them but not in the other and you won’t be able to authenticate from that second terminal window.
That is why you will need to activate your RC file each time you start a new terminal session. Once authenticated and while that terminal window is open, you can use it to issue OpenStack CLI commands at will.
Testing the connection
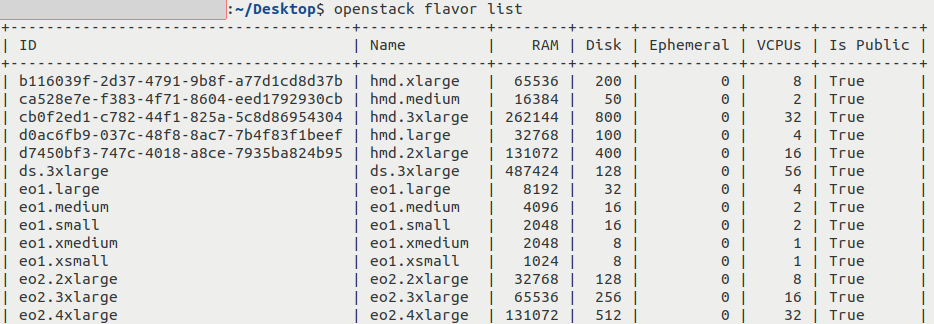
To verify access, execute the following command, which lists flavors available in EO-Lab cloud:
openstack flavor list
You should get output similar to this:
Entering a wrong password
If you entered a wrong password, you will not get an error. However, if you try to execute a command like openstack flavor list, you will get the error similar to this:
The request you have made requires authentication. (HTTP 401) (Request-ID: xxxxxxxxxxxxxxxxxxxxxxxxxxxxxxxxxxxxxxxx)
Instead of x characters, you will see a string of characters.
To resolve, activate your file again and enter the correct password.
What To Do Next
With the appropriate version of RC file activated, you should be able to create and use
instances,
volumes,
networks,
Kubernetes clusters
and, in general, use all OpenStack CLI commands.
For example, if you want to create a new virtual machine, you can follow this article:
How to create a VM using the OpenStack CLI client on EO-Lab cloud
If you want your new virtual machine to be based on an image which is not available on EO-Lab FRA1-1 cloud, you will need to upload it. The following article contains instructions how to do it:
How to upload your custom image using OpenStack CLI on EO-Lab