How to install OpenStackClient GitBash for Windows on EO-Lab
In this tutorial, you start with a standard Windows installation and end up being able to connect it to EO-Lab OpenStack cloud through a standard openstack command.
In the family of Microsoft Windows systems the implementation of a serviceable CLI client is more complicated than in Linux. Configuration file for OpenStack is not prepared for clear injection into CMD or PowerShell and the “export” syntax is not recognized. Hence we need to install a bash emulator.
This tutorial uses Visual Studio Community version which is free for non-commercial use. For the other way of installing OpenStack CLI on Windows see article How to install OpenStackClient on Windows using Windows Subsystem for Linux on EO-Lab OpenStack Hosting. One of the reasons for which you might consider the method described here is the fact that in comparison to Windows Subsystem for Linux it gives you simpler and more direct access to your local file system.
Warning
Installing Visual Studio, as described in this article, will require more than 10 GiB of hard drive space. The exact amount is subject to change. During this process, make sure that you do not run out of storage.
What We Are Going To Cover
Installing the required software (Python 3, PIP, Git for Windows and the appropriate compilers)
Creating an isolated Python environment for installing the OpenStack CLI client
Installing the OpenStack CLI client
Authenticating the OpenStack CLI client to the cloud
Invoking a simple command to test whether the process was successful
Prerequisites
No. 1 Hosting
You need a EO-Lab hosting account with Horizon interface https://cloud.fra1-1.cloudferro.com/auth/login/?next=/.
No. 2 Computer running Microsoft Windows
Your computer must be running Microsoft Windows 10 version 1909 or Windows 11. Also, Windows Server 2016, 2019 and 2022 are supported. The reason for that are the requirements of Microsoft Visual Studio.
Note
Virtual machines with Windows running on the EO-Lab cloud configured using the default images come with Python preinstalled. If that is your case, jump to Step 2 right away.
No. 3 Basic knowledge of the Linux terminal
You will need the basic knowledge of the Linux command line.
Step 1: Download and Install Python
Start your Internet browser and open the following website: https://www.python.org.
Hover your mouse over the Downloads button and choose Windows from the menu that has just appeared.
Pick up the latest version for Python.
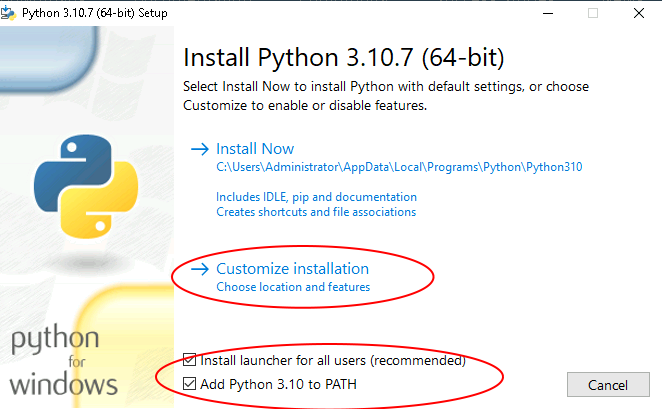
Download it and run that .exe file. Make sure to have options at the bottom of the window selected and click Customize installation.
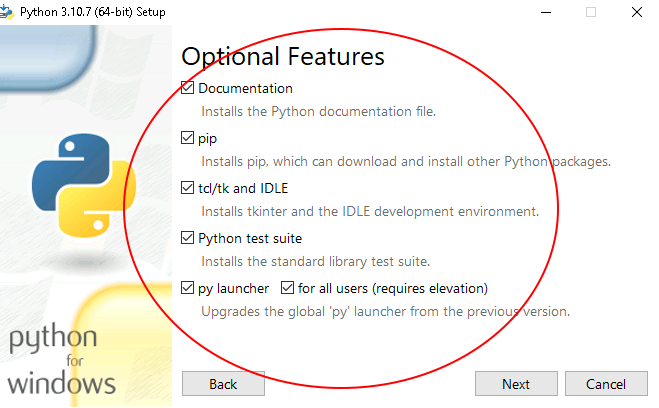
In the next screen select all the Optional Features:
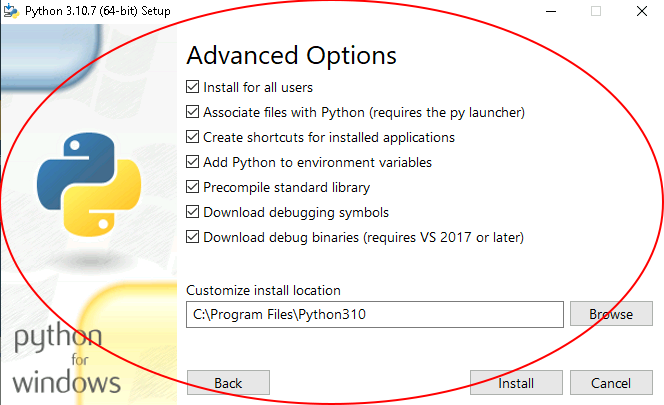
In the screen Advanced Options select all the available options and make sure that the install location is in the Program Files directory, like on the screenshot below:
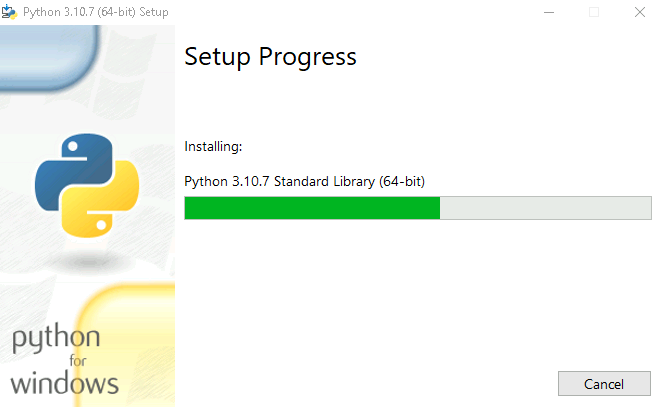
Click Install. Next you watch the progress of installation:
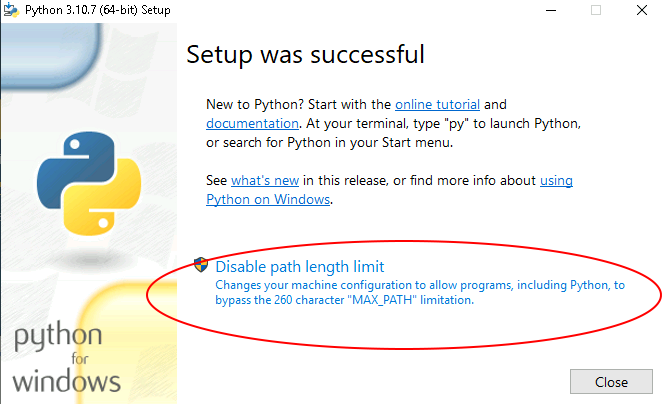
On the last screen make sure that you click the option Disable path length limit:
Now open command prompt (cmd command) and invoke python command in it to check whether the installation was successful. You should see something like this:
Microsoft Windows [Version 10.0.17763.2928]
(c) 2018 Microsoft Corporation. All rights reserved.

C:\Users\Administrator>python
Python 3.10.7 (tags/v3.10.7:6cc6b13, Sep  5 2022, 14:08:36) [MSC v.1933 64 bit (AMD64)] on win32
Type "help", "copyright", "credits" or "license" for more information.
>>>
Close the command prompt.
Step 2: Install Git Bash and pip
Git Bash for Windows emulates Linux terminal, allowing you to use common Linux commands ls, source, mv and others.
Download and install it from https://gitforwindows.org
During the installation keep the default options selected.
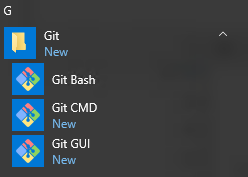
After installation, you should have the following entries in your Start menu:
Git Bash
Git CMD
Git GUI
The installation of Python and its suite of programs requires you to additionally install pip and update the necessary PythonSSL certificates.
Step 3: Install pip and update the PythonSSL certificates
pip is a useful tool for managing and installing Python images.
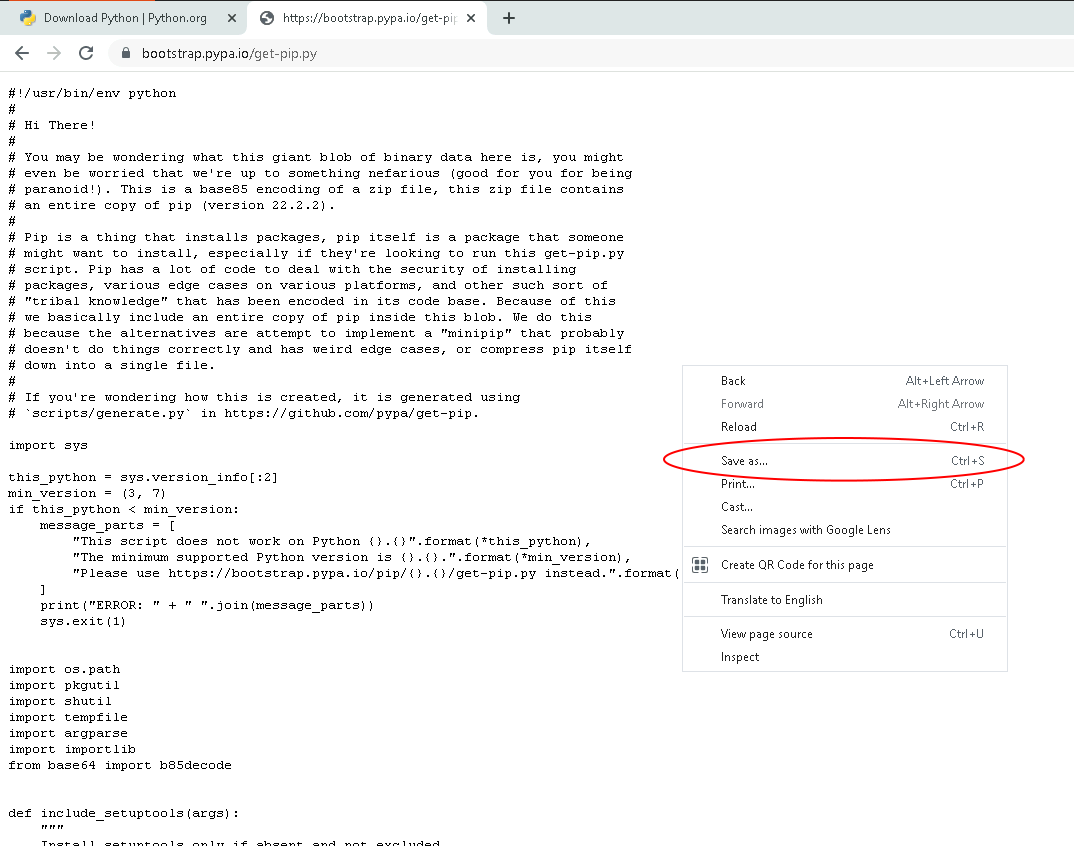
Download get-pip.py from https://bootstrap.pypa.io/get-pip.py. If it opens in your browser as a plain text document, right click anywhere on it in the browser and use the Save as… or similar option to save it on your computer.
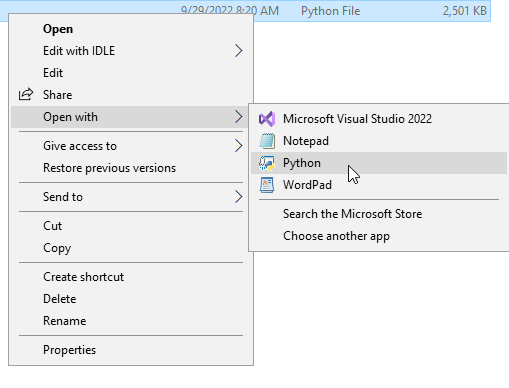
Run the script by opening it in Python:
It will install pip. The installation process can be monitored in a terminal window.
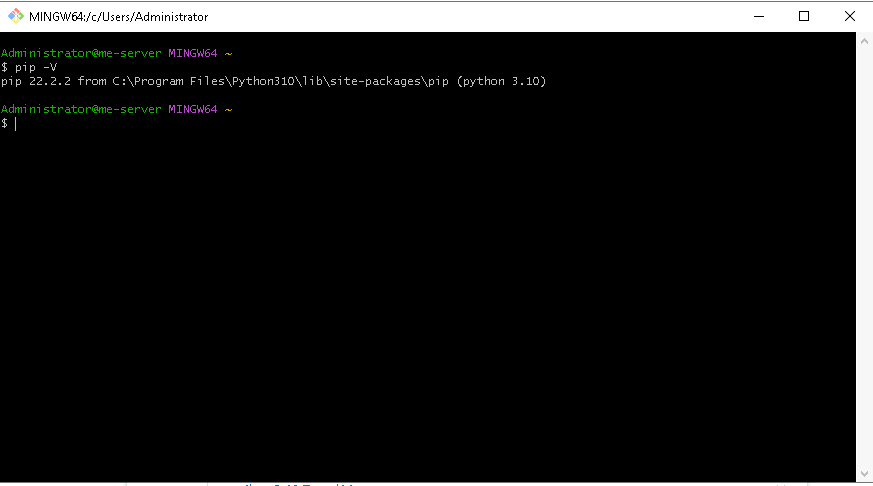
In order to test if the installation was successful, use Start menu to start Git Bash and type the following command:
pip -V
Your output should contain the version of pip that you have:
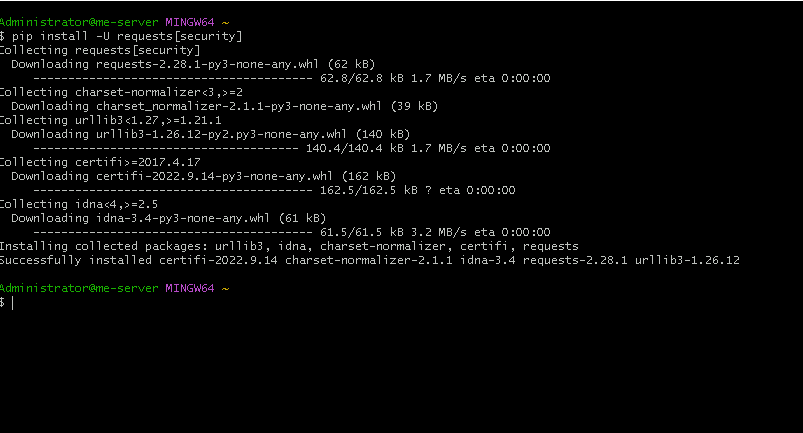
Now update PythonSSL certificates that you have on your computer:
pip install -U requests[security]
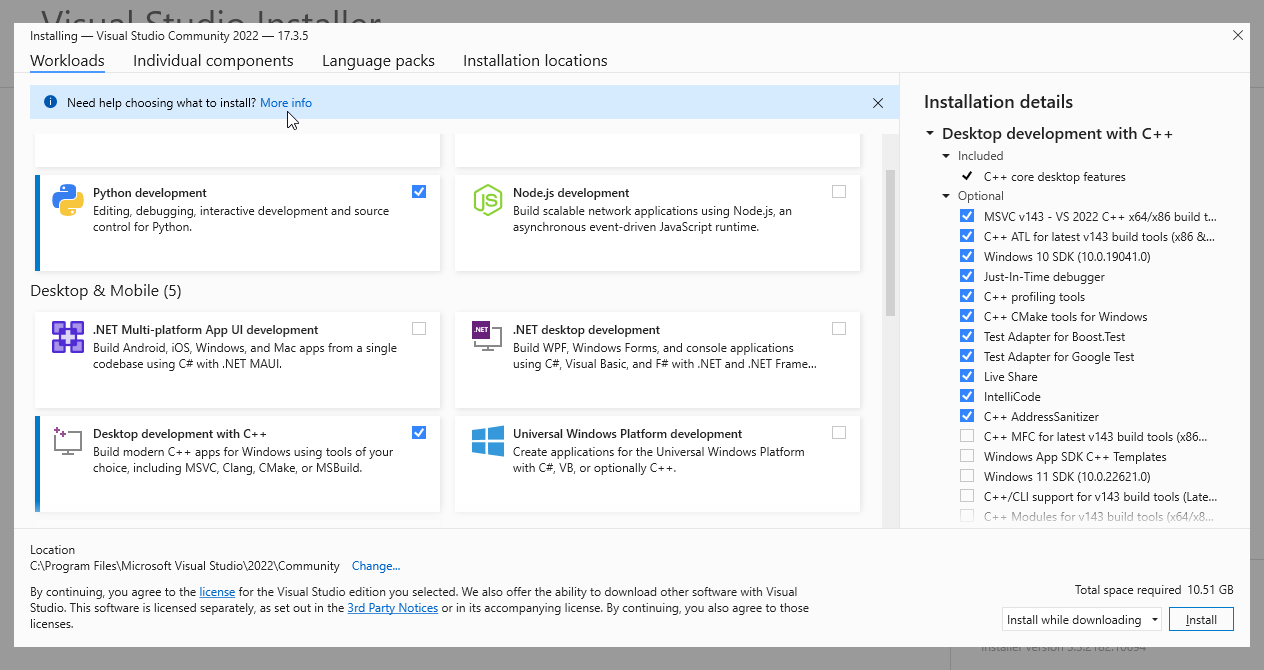
Step 4: Install Visual Studio
Microsoft Visual Studio will be installed because its installer provisions components which are needed for using the OpenStack CLI client.
Enter the following website: https://visualstudio.microsoft.com/downloads/
Download Community Edition.
During installation choose the packages selected on the screenshot below:
Step 5: Install virtualenv and the OpenStack CLI client
virtualenv allows you to perform Python operations in an isolated environment. In order to install it, start Git Bash and invoke the following command:
pip install virtualenv
Note
using key combination Shift+Ins or
right-click the Git Bash window and select Paste from the displayed menu.
The usual Windows commands such as CTRL+V or CTRL+Shift+V won’t work in GitBash window.
Now, change your current working directory (using the cd command) to the directory in which you want to store the OpenStackCLI client (it should be easy to access for you, it will be needed later), for example:
cd C:/Users/Administrator
Please make sure that you use forward slashes and not the typical Windows backward slashes - the former are typically used in UNIX-based systems and Git Bash creates such environment.
Invoke the following command to create the virtual environment openstack_cli which will be used for the OpenStack CLI client:
virtualenv openstack_cli
Note
The name used here, openstack_cli, is completely optional and you can use any other that you want.
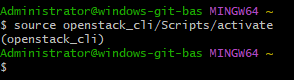
A directory called openstack_cli should appear in the current folder - it contains files needed for your isolated environment. In order to enter that environment, run the source command on the activate file which is in the Scripts folder found in the folder with your virtual environment:
source openstack_cli/Scripts/activate
From now on, the name of your isolated environment - openstack_cli - will be in the brackets before each command prompt indicating that you are inside it.
Closing the terminal and reopening will drop you from that environment.
Step 6: Install and configure the OpenStack CLI client
Without leaving Git Bash, type the following command:
pip install python-openstackclient
While the installation is running, go to your Internet browser and login using your EO-Lab account to the Horizon interface - https://cloud.fra1-1.cloudferro.com/auth/login/?next=/. There you will download the file used for authenticating the OpenStackCLI client.
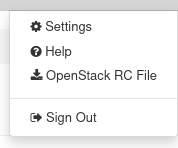
Click your e-mail address in the upper right corner of the page and select the option OpenStack RC File:
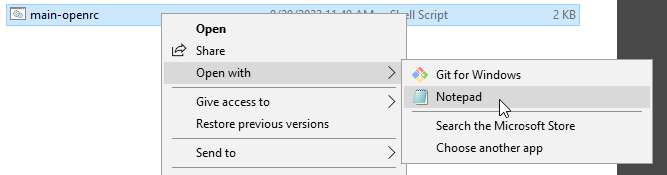
Right-click the downloaded file and select the option Open with -> Notepad to open the file using Notepad:
Add the following two lines to the end of that file:
export OS_VOLUME_API_VERSION=3
export OS_IMAGE_API_VERSION=2
Save the file and close Notepad.
Memorize or write somewhere down the name of that file and move it to the folder containing your virtual Python environment called openstack_cli.
Once the installation of the OpenStack CLI client is over, invoke the source comand in Git Bash on the just downloaded file (replace main-openrc.sh with the name of your file with the .rc extension):
source openstack_cli/main-openrc.sh
You should receive the prompt for your password. Type your password and press Enter.
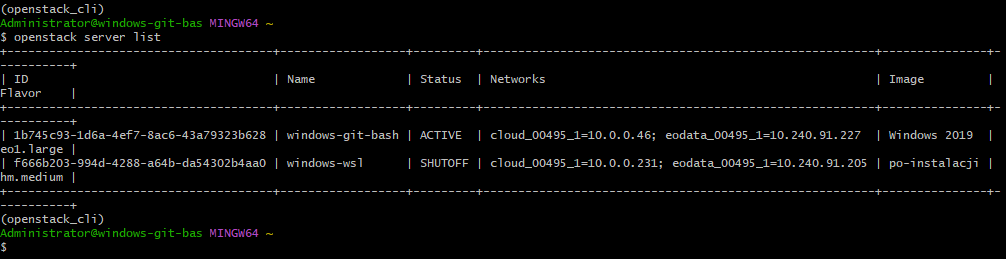
In order to test whether the OpenStack CLI client works, you can list virtual machines you currently operate. This would be the command:
openstack server list
The output should look similar to this:
Note
If you receive the HTTP 400 error, it may be caused by you not having added the necessary lines to your RC file. If that is the case, please make sure that you have added those lines as described in this step.
If you receive the HTTP 401 error, it may be caused by you having typed the wrong password. Source your RC file as previously and try again.
Reentering the Isolated Python Environment
To run the OpenStack CLI client again, say, after you might have closed the Git Bash window, or have had shut down or restarted Windows, you would have to repeat the same commands you entered above (replace C:/Users/Administrator with the path containing your openstack_cli folder and main-openrc.sh with the name of your RC file):
cd C:/Users/Administrator
source openstack_cli/Scripts/activate
source openstack_cli/main-openrc.sh
Enter the password and press Enter.
You can also create a batch file to automate reentering the Python environment.
What To Do Next
Other articles of interest:
How to Create and Configure new Openstack Project through Horizon on EO-Lab FRA1-1 Cloud
How to create a set of VMs using OpenStack Heat Orchestration on EO-Lab