How to create a set of VMs using OpenStack Heat Orchestration on EO-Lab
Heat is an OpenStack component responsible for Orchestration. Its purpose is to deliver automation engine and optimize processes.
Heat receives commands through templates which are text files in yaml format. A template describes the entire infrastructure that you want to deploy. The deployed environment is called a stack and can consist of any combination out of the 102 different resources that are available in OpenStack.
What We Are Going To Cover
Typical parts of a Heat template
Basic template for using Heat
How to get data for Heat Template
Using Heat with CLI
Using Heat with GUI
More advanced template for Heat
Prerequisites
No. 1 Account
You need a EO-Lab hosting account with access to the Horizon interface: https://cloud.fra1-1.cloudferro.com/auth/login/?next=/.
No. 2 Installed Python and its virtualenv
If you want to use Heat through CLI commands, Python must be installed and its virtual environment activated. See article How to install Python virtualenv or virtualenvwrapper on EO-Lab.
If you have never installed one of the OpenStack clients, see How To Install OpenStack and Magnum Clients for Command Line Interface to EO-Lab Horizon.
Basic template for using Heat
Using the following snippet, you can create one virtual machine, booted from ephemeral disk. Create a text file called template.yaml with your favorite text editor and save it to disk:
heat_template_version: 2015-04-30

resources:
  instance:
    type: OS::Nova::Server
    properties:
      flavor: eo1.xsmall
      image: Ubuntu 18.04 LTS
      networks:
        - network: <type in your network name here, e.g. cloud_00341_3>
        - network: <type in your network name here, e.g. eodata_00341_3>
      key_name: <type in your ssh key name>
      security_groups:
        - allow_ping_ssh_icmp_rdp
        - default
Important
Yaml format does not allow for tabs, you must enter spaces instead.
Typical parts of a Heat template
Here are the basic elements of a Heat template:
- heat_template_version
The exact version of heat template. Each of them varies in many ways (including support for various modules, additional parameters, customization etc). See Orchestration -> Template Versions.
- resources
Entry to commence providing particular components for deployment.
- instance
Name of resource (you can type in anything on your own).
- type
Definition of an OpenStack component (a comprehensive list is under Orchestration -> Resource Types)
- properties
Required parameters for deploying a component.
How to get data for Heat template
Templates need data for images, flavor networks, key pairs, security groups and so on. You would normally know all these elements in advance, or you could “look around” at various parts of OpenStack environment:
flavor |
Compute -> Instances -> Launch Instance -> Flavor |
image |
Compute -> Instances -> Launch Instance -> Source |
networks |
Network -> Networks -> cloud_ and eodata_ networks for your domain |
key_name |
Compute -> Key Pairs |
security_groups |
Network -> Security Groups |
You can work with Heat in two ways:
through Command Line Interface (CLI), with python-heatclient preinstalled and
interactively, through Horizon commands.
Using Heat with CLI
Assuming you have
installed Python and
activated its working environment
as explained in Prerequisite No. 2, run pip command to install python-heatclient:
pip install python-heatclient
To run a prepared template in order to deploy a stack, this is what a general command would look like:
openstack stack create -t template.yaml <stackname>
where -t assigns template for deployment and <stackname> defines name for the stack.
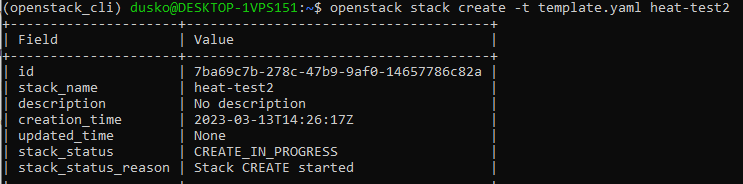
As a result, a new Stack would be executed and a new instance would be created. For example, the command
openstack stack create -t template.yaml heat-test2
would produce the following output:
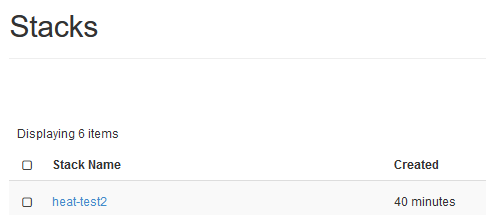
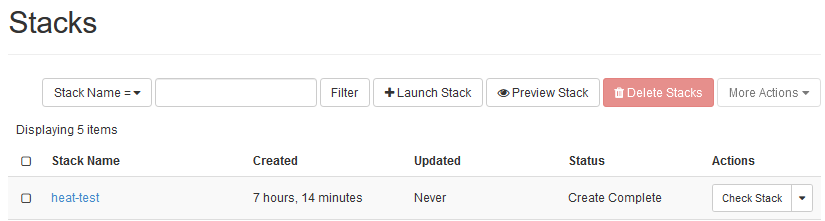
In Horizon, this is what you would see under Orchestration -> Stacks:
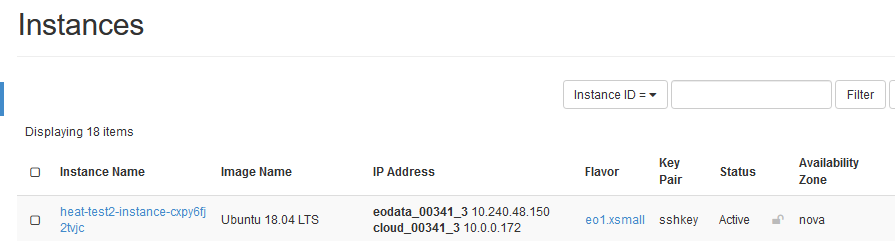
A new instance would be created under Compute -> Instances:
Using Heat with GUI
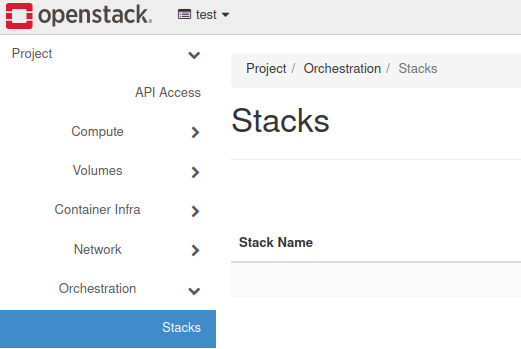
Log in to the Horizon dashboard, choose Orchestration and then Stacks tab:
Navigate to the right part of the screen, click on button 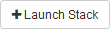 and bring Select Template window to the screen.
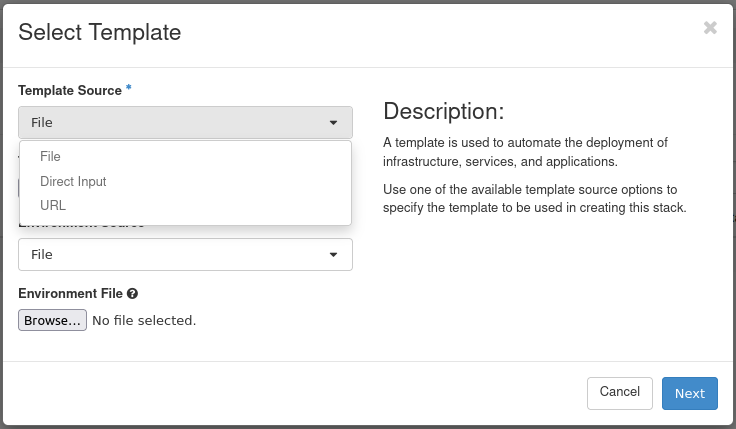
Enroll Template Source selector and choose a particular file, Direct Input or URL to your template.
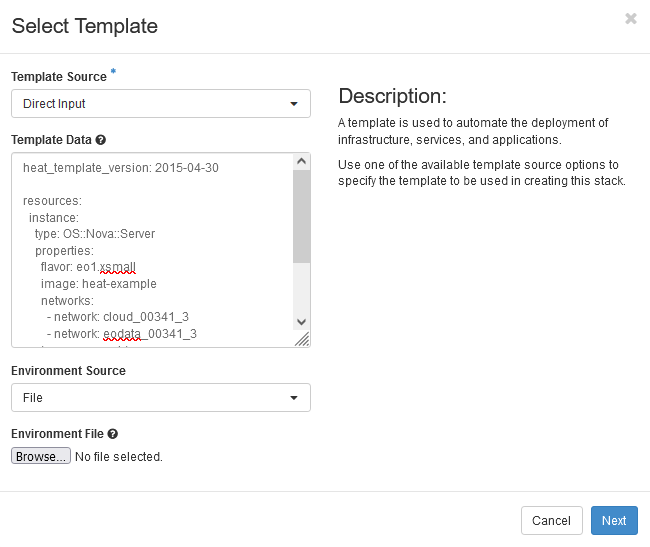
Enter the text of the template you copied from file template.yaml directly into the form:
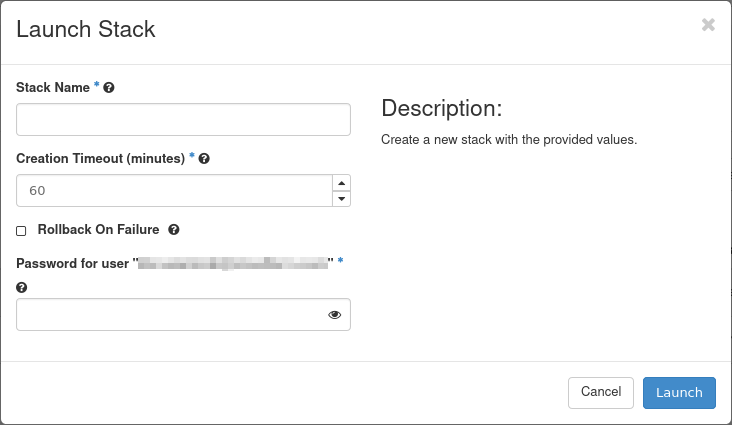
Provide a name of your stack and your openstack password:
As a result, a new Heat template will have been created:
By creating a stack in Horizon you have also executed that template. The result is that a new instance has been created – see it under Compute -> Instances:

We end up with two stacks and two new instances, once using a CLI and the other time, using a GUI.
Create four VMs using an advanced Heat template
In the following example we will attach parameters and then create ResourceGroup with counter, a VM booted from Cinder Volume and several predefined outputs. In parameter count we state that we want to generate 4 instances at once, which will yield us the automation that we wanted in the first place. Save the following code as template4.yaml:
heat_template_version: 2015-04-30

parameters:
   key_name:
       type: string
       label: sshkey
       description: SSH key to be used for all instances
       default: <insert your ssh key name here>
   image_id:
       type: string
       description: Image to be used. Check all available options in Horizon dashboard or, with CLI, use openstack image list command.
       default: Ubuntu 18.04 LTS
   private_net_id:
       type: string
       description: ID/Name of private network
       default:  <insert your network name here, e.g. cloud_00341_3>

resources:
       Group_of_VMs:
               type: OS::Heat::ResourceGroup
               properties:
                       count: 4
                       resource_def:
                               type: OS::Nova::Server
                               properties:
                                       name: my_vm%index%
                                       flavor: eo1.xsmall
                                       image: { get_param: image_id }
                                       networks:
                                               - network: { get_param: private_net_id }
                                       key_name: { get_param: key_name }
                                       security_groups:
                                               - allow_ping_ssh_icmp_rdp
                                               - default

       VOL_FAQ:
               type: OS::Cinder::Volume
               properties:
                       name: vol
                       size: 20
                       image : { get_param: image_id }


       With_volume:
               type: OS::Nova::Server
               properties:
                       flavor: eo1.xsmall
                       block_device_mapping: [{"volume_size": 20, "volume_id": { get_resource: VOL_FAQ }, "delete_on_termination": False, "device_name": "/dev/vda" }]
                       networks:
                                - network: { get_param: private_net_id }
                       key_name: { get_param: key_name }
                       security_groups:
                                - allow_ping_ssh_icmp_rdp
                                - default
                       image : { get_param: image_id }

outputs:
       SERVER_DETAILS:
               description: Shows details of all virtual servers.
               value: { get_attr: [ Group_of_VMs, show ] }
The first step is to create a real volume (called VOL_FAQ) and the second is to create a VM (With_volume).
Explanation
- Parameters
Here you provide default values (key_name, image_id, private_net_id in this case) and later inject them into resource definitions. The syntax is:
{get param: param_name }- ResourceGroup
Component being used for repeating deployment, e.g two identical VM’s.
- Count
Defines a variable for iterative operations.
- resource_def
Starting statement for defining group resources.
- %index%
This is how you add iterative number to the VM name, increasing values starting from 0.
- block_device_mapping
Property to define a bootable Cinder volume for instance.
- outputs
Additional information concerning deployed elements of the stack. In this case it returns a “show” attribute output. You can examine this kind of information by using openstack stack output list. Available attributes for every component can be found here..
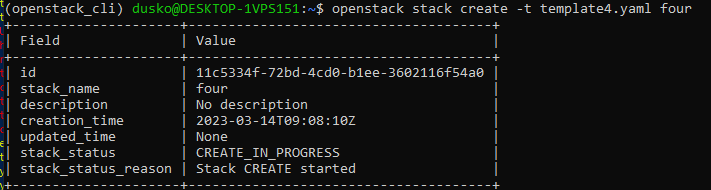
Execute the template with the following command:
openstack stack create -t template4.yaml four
The name of the stack will be four. This is the result in CLI window:
Under Compute -> Instance you would see five new instances created:
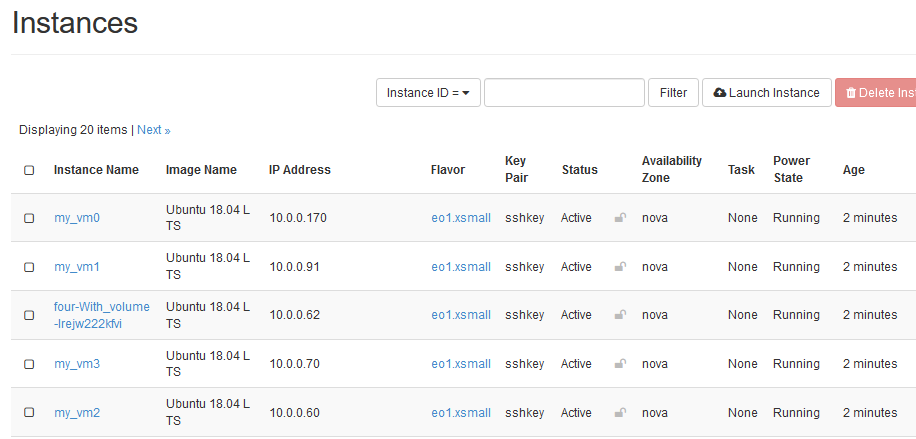
Four of them have names my_vm0, my_vm1, my_vm1 and my_vm1, as defined in line name: my_vm%index% in the template. The fifth is called four-With_volume-lrejw222kfvi. Its name starts the same as the name of the template itself while the rest is automatically generated.
What To Do Next
You can write your own templates as yaml files or you can use option Orchestration -> Template Generator, which will enable you to enter components in an interactive way:
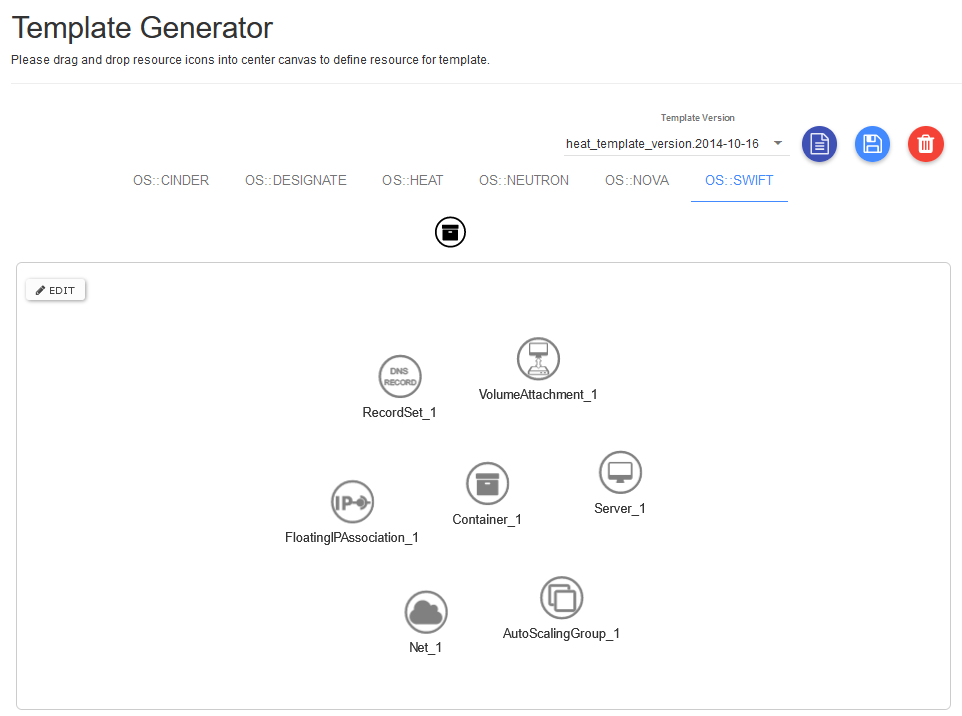
Further explanation of this option is out of scope of this article.