Install and run NooBaa on Kubernetes cluster in single-cloud EO-Lab environment
NooBaa enables creating an abstracted S3 backend on Kubernetes. Such backend can be connected to multiple S3 backing stores e.g. in a multi-cloud setup, allowing for storage expandability or High Availability among other beneficial features.
In this article you will learn the basics of using NooBaa
how to install it on Kubernetes cluster
how to create a NooBaa bucket backed by S3 object storage in the EO-Lab cloud
how to create a NooBaa bucket mirroring data on two different clouds
What We Are Going To Cover
Install NooBaa in local environment
Apply preliminary configuration
Install NooBaa on the Kubernetes cluster
Create a NooBaa backing store
Create a Bucket Class
Create an ObjectBucketClaim
Connect to NooBaa bucket from S3cmd
Testing access to the bucket
Prerequisites
No. 1 Hosting
You need a EO-Lab hosting account with Horizon interface https://cloud.fra1-1.cloudferro.com/auth/login/?next=/.
No. 2 Access to Kubernetes cluster on FRA1-1 cloud
A cluster on FRA1-1 cloud, where we will run our NooBaa installation - follow guidelines in this article How to Create a Kubernetes Cluster Using EO-Lab OpenStack Magnum.
No. 3 Familiarity with using Object Storage on CloudFerro clouds
More information in How to use Object Storage on EO-Lab
Traditional OpenStack term for imported or downloaded files is Containers in main menu option Object Store. We will use the term “bucket” for object storage containers, to differentiate vs. container term in Docker/Kubernetes sense.
No. 4 kubectl operational
kubectl CLI tool installed and pointing to your cluster via KUBECONFIG env. variable - more information in How To Access Kubernetes Cluster Post Deployment Using Kubectl On EO-Lab OpenStack Magnum.
No. 5 Access to private S3 keys in FRA1-1 cloud
You may also use access to OpenStack CLI to generate and read the private S3 keys - How to generate and manage EC2 credentials on EO-Lab.
No. 6 Familiarity with s3cmd for accessing object storage
For more info on s3cmd, see How to access private object storage using S3cmd or boto3 on EO-Lab.
Install NooBaa in local environment
The first step to work with NooBaa is to install it on our local system. We will download the installer, make it executable and move it to the system path:
curl -LO https://github.com/noobaa/noobaa-operator/releases/download/v5.11.0/noobaa-linux-v5.11.0
chmod +x noobaa-linux-v5.11.0
sudo mv noobaa-linux-v5.11.0 /usr/local/bin/noobaa
Enter the password for root user, if required.
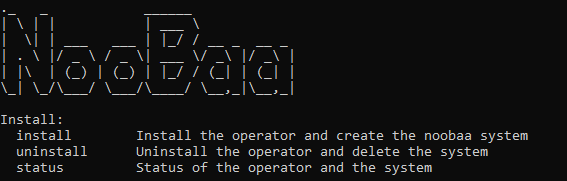
After this sequence of steps, it should be possible to run a test command
noobaa help
This will result in an output similar to the below:
Apply preliminary configuration
We will need to apply additional configuration on a Magnum cluster to avoid PodSecurityPolicy exception.
Let’s start by creating a dedicated namespace for Noobaa artifacts:
kubectl create namespace noobaa
Then create a file noobaa-rolebinding.yaml with the following contents:
noobaa-rolebinding.yaml
apiVersion: rbac.authorization.k8s.io/v1
kind: RoleBinding
metadata:
  name: noobaa-rolebinding
  namespace: noobaa
subjects:
- apiGroup: rbac.authorization.k8s.io
  kind: Group
  name: system:serviceaccounts
roleRef:
  apiGroup: rbac.authorization.k8s.io
  kind: ClusterRole
  name: magnum:podsecuritypolicy:privileged
and apply with:
kubectl apply -f noobaa-rolebinding.yaml
Install NooBaa on the Kubernetes cluster
We already have NooBaa available in our local environment, but we still need to install NooBaa on our Kubernetes cluster. NooBaa will use the context of the KUBECONFIG by kubectl (as activated in Prerequisite No. 4), so install NooBaa in the dedicated namespace:
noobaa install -n noobaa
After a few minutes, this will install NooBaa and provide additional information about the setup. See the status of NooBaa with command
noobaa status -n noobaa
It outputs several useful insights about the NooBaa installation, with the “key facts” available towards the end of this status:
NooBaa created a default backing store called noobaa-default-backing-store, backed by a block volume created in OpenStack.
S3 credentials are provided to access the bucket created with the default backing store. Such volume-based backing store has its use e.g. for utilizing the S3 access method to our block storage.
For the purpose of this article, we will not use the default backing store, but rather learn to create a new backing store based on cloud S3 object storage. Such setup can be then easily extended so that we can end up with separate backing stores for different clouds.
Create a NooBaa backing store
Step 1. Create object storage bucket on FRA1-1
Now create an object storage bucket on FRA1-1 cloud:
switch to Horizon,
use commands Object Store –> Containers –> + Container to create a new object bucket.

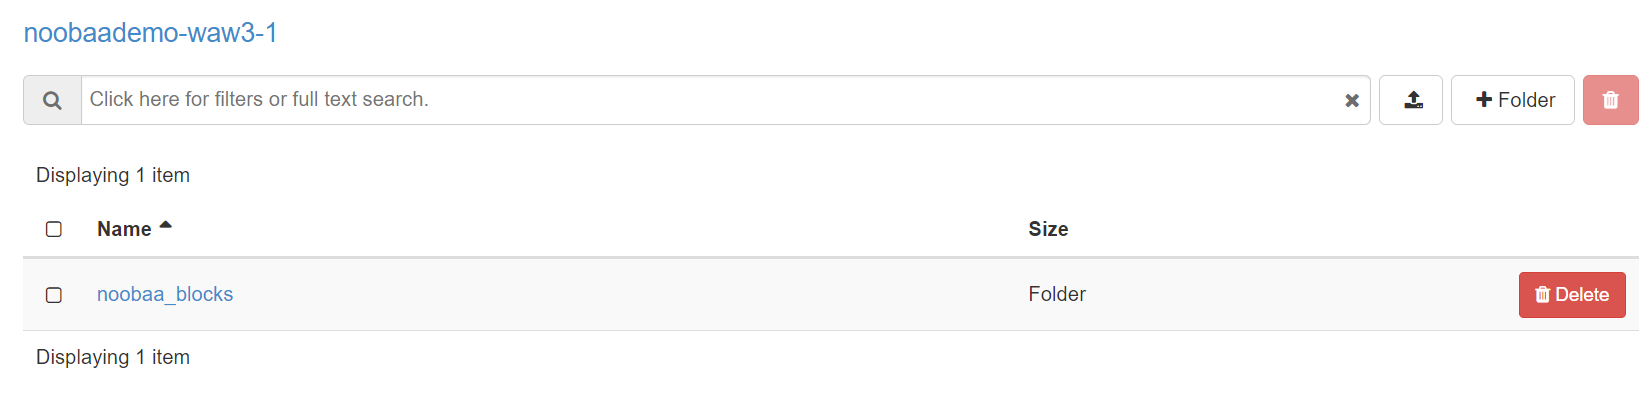
Buckets on FRA1-1 cloud need to have unique names. In our case, we use bucket name noobaademo-fra-1 which we will use throughout the article.
Note
You need to create a bucket with a different name and use this generated name to follow along.
Step 2. Set up EC2 credentials
If you have properly set up the EC2 (S3) keys for your FRA1-1 object storage, take note of them with the following command:
openstack ec2 credentials list
Step 3. Create a new NooBaa backing store
With the above in place, we can create a new NooBaa backing store called custom-bs by running the command below. Make sure to replace the access-key XXXXXX and the secret-key YYYYYYY with your own EC2 keys and the bucket with your own bucket name:
noobaa -n noobaa backingstore create s3-compatible custom-bs --endpoint https://s3.fra1-1.cloudferro.com --signature-version v4 --access-key XXXXXX \
--secret-key YYYYYYY --target-bucket noobaademo-fra1-1
Note that the credentials get stored as a Kubernetes secret in the namespace. You can verify that the backing store and the secret got created by running the following commands:
kubectl get backingstore -n noobaa
kubectl get secret -n noobaa
The naming of the artifacts will follow the name of the backing store in case there are already more such resources available in the namespace.
Also, when viewing the bucket in Horizon (backing store), we can see NooBaa populated it’s folder structure:
Step 4. Create a Bucket Class
When we have the backing store, the next step is to create a BucketClass (BC). Such BucketClass serves as a blueprint for NooBaa buckets: it defines
which BackingStore(s) these buckets will use, and
which placement strategy to use in case of multiple bucket stores.
The placement strategy could be Mirror or Spread. There is also support for using multiple tiers, where data is by default pushed to the first tier, and when this is full, to the next one.
In order to create a BucketClass, prepare the following file custom-bc.yaml:
custom-bc.yaml
apiVersion: noobaa.io/v1alpha1
kind: BucketClass
metadata:
  labels:
    app: noobaa
  name: custom-bc
  namespace: noobaa
spec:
  placementPolicy:
    tiers:
    - backingStores:
      - custom-bs
      placement: Spread
Then apply with:
kubectl apply -f custom-bc.yaml
Step 5. Create an ObjectBucketClaim
As the last step, we create an ObjectBucketClaim. This bucket claim utilizes the noobaa.noobaa.io storage class which got deployed with NooBaa, and references the custom-bc bucket class created in the previous step. Create a file called custom-obc.yaml:
custom-obc.yaml
apiVersion: objectbucket.io/v1alpha1
kind: ObjectBucketClaim
metadata:
  name: custom-obc
  namespace: noobaa
spec:
  generateBucketName: my-bucket
  storageClassName: noobaa.noobaa.io
  additionalConfig:
    bucketclass: custom-bc
Then apply with:
kubectl apply -f custom-obc.yaml
Step 6. Obtain name of the NooBaa bucket
As a result, besides the ObjectBucket claim resource, also a configmap and a secret with the same name custom-obc got created in NooBaa. Let’s view the configmap with:
kubectl get configmap custom-obc -n noobaa -o yaml
The result is similar to the following:
apiVersion: v1
data:
  BUCKET_HOST: s3.noobaa.svc
  BUCKET_NAME: my-bucket-7941ba4a-f57b-400a-b870-b337ec5284cf
  BUCKET_PORT: "443"
  BUCKET_REGION: ""
  BUCKET_SUBREGION: ""
kind: ConfigMap
metadata:
  ...
We can see the name of the NooBaa bucket my-bucket-7941ba4a-f57b-400a-b870-b337ec5284cf, which is backing up our “physical” FRA1-1 bucket. Store this name for later use in this article.
Step 7. Obtain secret for the NooBaa bucket
The secret is also relevant for us as we need to extract the S3 keys to the NooBaa bucket. The access and secret key are base64 encoded in the secret, we can retrieve them decoded with the following commands:
kubectl get secret custom-obc -n noobaa -o jsonpath='{.data.AWS_ACCESS_KEY_ID}' | base64 --decode
kubectl get secret custom-obc -n noobaa -o jsonpath='{.data.AWS_SECRET_ACCESS_KEY}' | base64 --decode
Take note of access and secret keys, as we will use them in the next step.
Step 8. Connect to NooBaa bucket from S3cmd
Noobaa created a few services when it got deployed, which we can verify with the command below:
kubectl get services -n noobaa
The output should be similar to the one below:
NAME           TYPE           CLUSTER-IP       EXTERNAL-IP      PORT(S)                                                    AGE
noobaa-db-pg   ClusterIP      10.254.158.217   <none>           5432/TCP                                                   3h24m
noobaa-mgmt    LoadBalancer   10.254.145.9     64.225.135.152   80:31841/TCP,443:31736/TCP,8445:32063/TCP,8446:32100/TCP   3h24m
s3             LoadBalancer   10.254.244.226   64.225.133.81    80:30948/TCP,443:31609/TCP,8444:30079/TCP,7004:31604/TCP   3h24m
sts            LoadBalancer   10.254.23.154    64.225.135.92    443:31374/TCP                                              3h24m
The “s3” service provides the endpoint that can be used to access Nooba storage (backed by the actual storage in FRA1-1). In our case, this endpoint URL is 64.225.133.81. Replace it with the value you get from the above command, when working through this article.
Step 9. Configure S3cmd to access NooBaa
Now that we have both the endpoint and the keys, we can configure s3cmd to access the bucket created by NooBaa. Create a configuration file noobaa.s3cfg with the following contents:
check_ssl_certificate = False
check_ssl_hostname = False
access_key = XXXXXX
secret_key = YYYYYY
host_base = 64.225.133.81
host_bucket = 64.225.133.81
use_https = True
verbosity = WARNING
signature_v2 = False
Then from the same location apply with:
s3cmd --configure -c noobaa.s3cfg
If the s3cmd is not installed on your system, see Prerequisite No. 6.
The s3cmd command will let you press Enter to confirm each value from config file and let you change it on the fly, if different from default.
Omitting those questions in the output below, the result should be similar to the following:
...
Success. Your access key and secret key worked fine :-)

Now verifying that encryption works...
Not configured. Never mind.

Save settings? [y/N] y
Configuration saved to 'noobaa.s3cfg'
Step 10. Testing access to the bucket
We can upload a test file to NooBaa. In our case, we upload a simple text file xyz.txt with text content “xyz”, using the following command:
s3cmd put xyz.txt s3://my-bucket-7941ba4a-f57b-400a-b870-b337ec5284cf -c noobaa.s3cfg
The file gets uploaded correctly:
upload: 'xyz.txt' -> 's3://my-bucket-7941ba4a-f57b-400a-b870-b337ec5284cf/xyz.txt'  [1 of 1]
 4 of 4   100% in    0s     5.67 B/s  done
We can also see in Horizon that a few new folders and files were added to NooBaa. However, we will not see the xyz.txt file directly there, because NooBaa applies its own fragmentation techniques on the data.