Installing HashiCorp Vault on EO-Lab FRA1-1 Magnum
In Kubernetes, a Secret is an object that contains passwords, tokens, keys or any other small pieces of data. Using Secrets ensures that the probability of exposing confidential data while creating, running and editing Pods is much smaller. The main problem is that Secrets are stored unencrypted in etcd so anyone with
API access, as well as anyone who
can create a Pod or create a Deployment in a namespace
can also retrieve or modify a Secret.
You can apply a number of strategies to improve the security of the cluster or you can install a specialized solution such as HashiCorp Vault. It offers
secure storage of all kinds of secrets – passwords, TLS certificates, database credentials, API encryption keys and others,
encryption of all of the data,
dynamic serving of the credentials,
granular access policies for users, applications, and services,
logging and auditing of data usage,
revoking or deleting any key or secret,
setting automated secret rotation – for administrators and users alike.
In this article, we shall install HashiCorp Vault within a Magnum Kubernetes cluster, on EO-Lab FRA1-1.
What We Are Going To Cover
Install self-signed TLS certificates with CFSSL
Generate certificates to enable encryption of traffic with Vault
Install Consul storage backend for High Availability
Install Vault
Sealing and unsealing the Vault
Unseal Vault
Run Vault UI
Return livenessProbe to production value
Troubleshooting
Prerequisites
No. 1 Account
You need a EO-Lab hosting account with access to the Horizon interface: https://cloud.fra1-1.cloudferro.com/auth/login/?next=/.
No. 2 Familiarity with kubectl
You should have an appropriate Kubernetes cluster up and running, with kubectl pointing to it How To Access Kubernetes Cluster Post Deployment Using Kubectl On EO-Lab OpenStack Magnum
No. 3 Familiarity with deploying Helm charts
This article will introduce you to Helm charts on Kubernetes:
Deploying Helm Charts on Magnum Kubernetes Clusters on EO-Lab FRA1-1
Step 1 Install CFSSL
To ensure that Vault communication with the cluster is encrypted, we need to provide TLS certificates.
We will use the self-signed TLS certificates issued by a private Certificate Authority. To generate them we will use CFSSL utilities: cfssl and cfssljson.
cfssl is a CLI utility. cfssljson takes the JSON output from cfssl and writes certificates, keys, and CSR (certificate signing requests).
We need to download the binaries of both tools: cfssl and cfssljson from https://github.com/cloudflare/cfssl and make them executable:
curl -L https://github.com/cloudflare/cfssl/releases/download/v1.6.3/cfssl_1.6.3_linux_amd64 -o cfssl
curl -L https://github.com/cloudflare/cfssl/releases/download/v1.6.1/cfssljson_1.6.1_linux_amd64 -o cfssljson
chmod +x cfssl
chmod +x cfssljson
Then we also need to add them to our path:
sudo mv cfssl cfssljson /usr/local/bin
Step 2 Generate TLS certificates
Before we start, let’s create a dedicated namespace where all Vault-related Kubernetes resources will live:
kubectl create namespace vault
We will need to issue two sets of certificates. The first set will be a root certificate for Certificate Authority. The second will reference the CA certificate and create the actual Vault cert.
To create the key request for CA, we will base it on a JSON file ca-csr.json. Create this file in your favorite editor, and if you want to, substitute the certificate details to your own use case:
ca-csr.json
{
  "hosts": [
    "cluster.local"
  ],
  "key": {
    "algo": "rsa",
    "size": 2048
  },
  "names": [
    {
        "C": "Poland",
        "L": "Warsaw",
        "O": "MyOrganization"
    }
  ]
}
Then issue the command to generate a self-signed root CA certificate.
cfssl gencert -initca ca-csr.json | cfssljson -bare ca
You should see output similar to the following:
2023/01/02 15:27:36 [INFO] generating a new CA key and certificate from CSR
2023/01/02 15:27:36 [INFO] generate received request
2023/01/02 15:27:36 [INFO] received CSR
2023/01/02 15:27:36 [INFO] generating key: rsa-2048
2023/01/02 15:27:36 [INFO] encoded CSR
2023/01/02 15:27:36 [INFO] signed certificate with serial number 472447709029717049436439292623827313295747809061
Also, as a result, three entities are generated:
the private key,
the CSR, and the
self-signed certificate (ca.pem, ca.csr, ca-key.pem).
The next step is to create Vault certificates, which reference the private CA. To do so, first create a configuration file ca-config.json, to override the default configuration. This is especially useful for changing certificate validity:
ca-config.json
{
  "signing": {
    "default": {
      "expiry": "17520h"
    },
    "profiles": {
      "default": {
        "usages": ["signing", "key encipherment", "server auth", "client auth"],
        "expiry": "17520h"
      }
    }
  }
}
Then generate the Vault keys, referencing this file and the CA keys:
cfssl gencert \
  -ca ./ca.pem \
  -ca-key ./ca-key.pem \
  -config ca-config.json \
  -profile default \
  -hostname="vault,vault.vault.svc.cluster.local,localhost,127.0.0.1" \
  ca-csr.json | cfssljson -bare vault
The result will be the following:
2023/01/02 16:19:52 [INFO] generate received request
2023/01/02 16:19:52 [INFO] received CSR
2023/01/02 16:19:52 [INFO] generating key: rsa-2048
2023/01/02 16:19:52 [INFO] encoded CSR
2023/01/02 16:19:52 [INFO] signed certificate with serial number 709743788174272015258726707100830785425213226283
Also, another three files get created in your working folder: vault.pem, vault.csr, vault-key.pem.
The last step is to store the generated keys as Kubernetes TLS secrets on our cluster:
kubectl -n vault create secret tls tls-ca --cert ./ca.pem --key ./ca-key.pem -n vault
kubectl -n vault create secret tls tls-server --cert ./vault.pem --key ./vault-key.pem -n vault
The naming of those secrets reflects the Vault Helm chart default names.
Step 3 Install Consul Helm chart
The Consul backend will ensure High Availability of our Vault installation. Consul will live in a namespace that we have already created, vault.
Here is an override configuration file for the Consul Helm chart: consul-values.yaml.
consul-values.yaml
global:
  datacenter: vault-kubernetes-guide

client:
  enabled: true

server:
  replicas: 1
  bootstrapExpect: 1
  disruptionBudget:
    maxUnavailable: 0
Now install the hashicorp repository of Helm charts and verify that vault is in it:
helm repo add hashicorp https://helm.releases.hashicorp.com
helm search repo hashicorp/vault
As the last step, install Consul chart:
helm install consul hashicorp/consul -f consul-values.yaml -n vault
This is the report about success of the installation:
NAME: consul
LAST DEPLOYED: Thu Feb  9 18:52:58 2023
NAMESPACE: vault
STATUS: deployed
REVISION: 1
NOTES:
Thank you for installing HashiCorp Consul!

Your release is named consul.
Shortly, several Consul pods will get deployed in the vault namespace. Run the following command to verify it:
kubectl get pods -n vault
Wait until all of the pods are Running and then proceed with the next step.
Step 4 Install Vault Helm chart
We are now ready to install Vault.
First, let’s provide file vault-values.yaml which will override configuration file for the Vault Helm chart. These overrides ensure turning on encryption, High Availability, setting up larger time for readinessProbe and exposing the UI as LoadBalancer service type:
vault-values.yaml
# Vault Helm Chart Value Overrides
global:
  enabled: true
  tlsDisable: false

injector:
  enabled: true
  image:
    repository: "hashicorp/vault-k8s"
    tag: "0.14.1"

  resources:
  requests:
    memory: 500Mi
    cpu: 500m
  limits:
    memory: 1000Mi
    cpu: 1000m

server:
  # These Resource Limits are in line with node requirements in the
  # Vault Reference Architecture for a Small Cluster

  image:
    repository: "hashicorp/vault"
    tag: "1.9.2"

  # For HA configuration and because we need to manually init the vault,
  # we need to define custom readiness/liveness Probe settings
  readinessProbe:
    enabled: true
    path: "/v1/sys/health?standbyok=true&sealedcode=204&uninitcode=204"
  livenessProbe:
    enabled: true
    path: "/v1/sys/health?standbyok=true"
    initialDelaySeconds: 360

  extraEnvironmentVars:
    VAULT_CACERT: /vault/userconfig/tls-ca/tls.crt

  # extraVolumes is a list of extra volumes to mount. These will be exposed
  # to Vault in the path `/vault/userconfig/<name>/`.
  # These reflect the Kubernetes vault and ca secrets created
  extraVolumes:
    - type: secret
      name: tls-server
    - type: secret
      name: tls-ca

  standalone:
    enabled: false

  # Run Vault in "HA" mode.
  ha:
    enabled: true
    replicas: 3
    config: |
      ui = true

      listener "tcp" {
        tls_disable = 0
        address     = "0.0.0.0:8200"
        tls_cert_file = "/vault/userconfig/tls-server/tls.crt"
        tls_key_file = "/vault/userconfig/tls-server/tls.key"
        tls_min_version = "tls12"
      }
      storage "consul" {
        path = "vault"
        address = "consul-consul-server:8500"
      }


# Vault UI
ui:
  enabled: true
  serviceType: "LoadBalancer"
  serviceNodePort: null
  externalPort: 8200
Then run the installation:
helm install vault hashicorp/vault -n vault -f vault-values.yaml
As a result, several pods get created:
kubectl get pods -n vault
NAME                                                  READY   STATUS    RESTARTS   AGE
consul-consul-client-655fq                            1/1     Running   0          104s
consul-consul-client-dkngt                            1/1     Running   0          104s
consul-consul-client-nnbnl                            1/1     Running   0          104s
consul-consul-connect-injector-8447d8d97b-8hkj8       1/1     Running   0          104s
consul-consul-server-0                                1/1     Running   0          104s
consul-consul-webhook-cert-manager-7c4ccbdd4c-d89bw   1/1     Running   0          104s
vault-0                                               1/1     Running   0          23s
vault-1                                               1/1     Running   0          23s
vault-2                                               1/1     Running   0          23s
vault-agent-injector-6c7cfc768-kv968                  1/1     Running   0          23s
Sealing and unsealing the Vault
Right after the installation, Vault server starts in a sealed state. It knows where and how to access the physical storage but, by design, it is lacking the key to decrypt any of it. The only operations you can do when Vault is sealed are to
unseal Vault and
check the status of the seal.
The reverse process, called unsealing, consists of creating the plaintext root key necessary to read the decryption key.
In real life, there would be an administrator who could first generate the so-called key shares or unseal keys, which is a set of exactly five text strings. Then they would disperse these keys to two or more people, so that the secrets would be hard to gather for a potential attacker. And to perform the unsealing, at least three out of those five strings would have to be presented to the Vault, in any order.
In this article, however, you are both the administrator and the user and can set up things your way. First you will
generate the keys and have them available in plain sight and then you will
enter three out of those five strings back to the system.
You will have a limited but sufficient amount of time to enter the keys; the value livenessProbe in file vault-values.yaml is 360 seconds, which will give you ample time to enter the keys.
At the end of the article we show how to interactively set it to 60 seconds, so that the cluster can check health of the pods more frequently.
Step 5 Unseal Vault
Three nodes in the Kubernetes cluster represent Vault and are named vault-0, vault-1, vault-2. To make the Vault functional, you will have to unseal all three of them.
To start, enter the container in vault-0:
kubectl -n vault exec -it vault-0 -- sh
Then from inside the pod, get the keys:
vault operator init
The result will be the following, you will get the 5 unseal keys and a root token. Save these keys to Notepad, so you have convenient access to them later:
Unseal Key 1: jcJj2ukVBNG5K01PX3UkskPotc+tGAvalG5CqBveS6LN
Unseal Key 2: OBzqfTYL9lmmvuewk85kPxpgc0D/CDVXrY9cdBElA3hJ
Unseal Key 3: M6QysiGixui4SlqB7Jdgv0jaHn8m45V91iabrxRvNo6v
Unseal Key 4: H7T5BHR2isbBSHfu2q4aKG0hvvA13uXlT9799whxmuL+
Unseal Key 5: rtbXv3TqdUeN3luelJa8OOI/CKlILANXxFVkyE/SKv4c

Initial Root Token: s.Pt7xVk5rShSuIJqRPqBFWY5H
Then, from within the pod vault-0, unseal it by typing:
vault operator unseal
You will get prompted for the key, then paste key 1 from your notepad. Repeat this process 3 times in the vault-0 pod, each time providing a different key out of those five you have just generated.
This is what the entire process looks like:
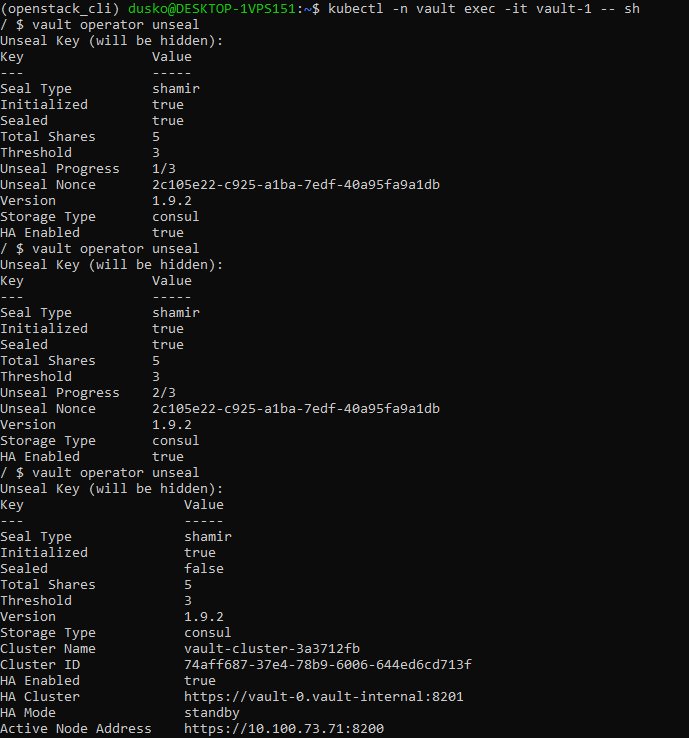
In third attempt, the values change to Initialized to be true and sealed to be false:
Key                    Value
---                    -----
Seal Type              shamir
Initialized            true
Sealed                 false
...                    ...
The pod is unsealed.
Now repeat the same process for vault-1 and vault-2 pods.
To stop using the console in vault-0, press Ctrl-D on keyboard. Then enter vault-1 with command
kubectl -n vault exec -it vault-1 -- sh
and unseal it by entering at least three keys. Then the similar procedure for vault-2. Only when all three pods are unsealed will the Vault become active.
Step 6 Run Vault UI
With our configuration, Vault UI is exposed on port 8200 of a dedicated LoadBalancer that got created.
To check the LoadBalancer, run:
kubectl -n vault get svc
Check the external IP of the LoadBalancer (it could take a couple of minutes when external IP is available):
NAME                             TYPE           CLUSTER-IP       EXTERNAL-IP      PORT(S)                                                                            AGE
...
vault-ui                         LoadBalancer   10.254.49.9      64.225.129.145   8200:32091/TCP                                                                     143m
Type the external IP to the browser, specifying HTTPS and port 8200. The site may ask you for the certificate and can complain that there is a risk of proceeding. You should accept all the risks and see that Vault UI is available, similar to the image below. To login, provide the token which you obtained earlier:
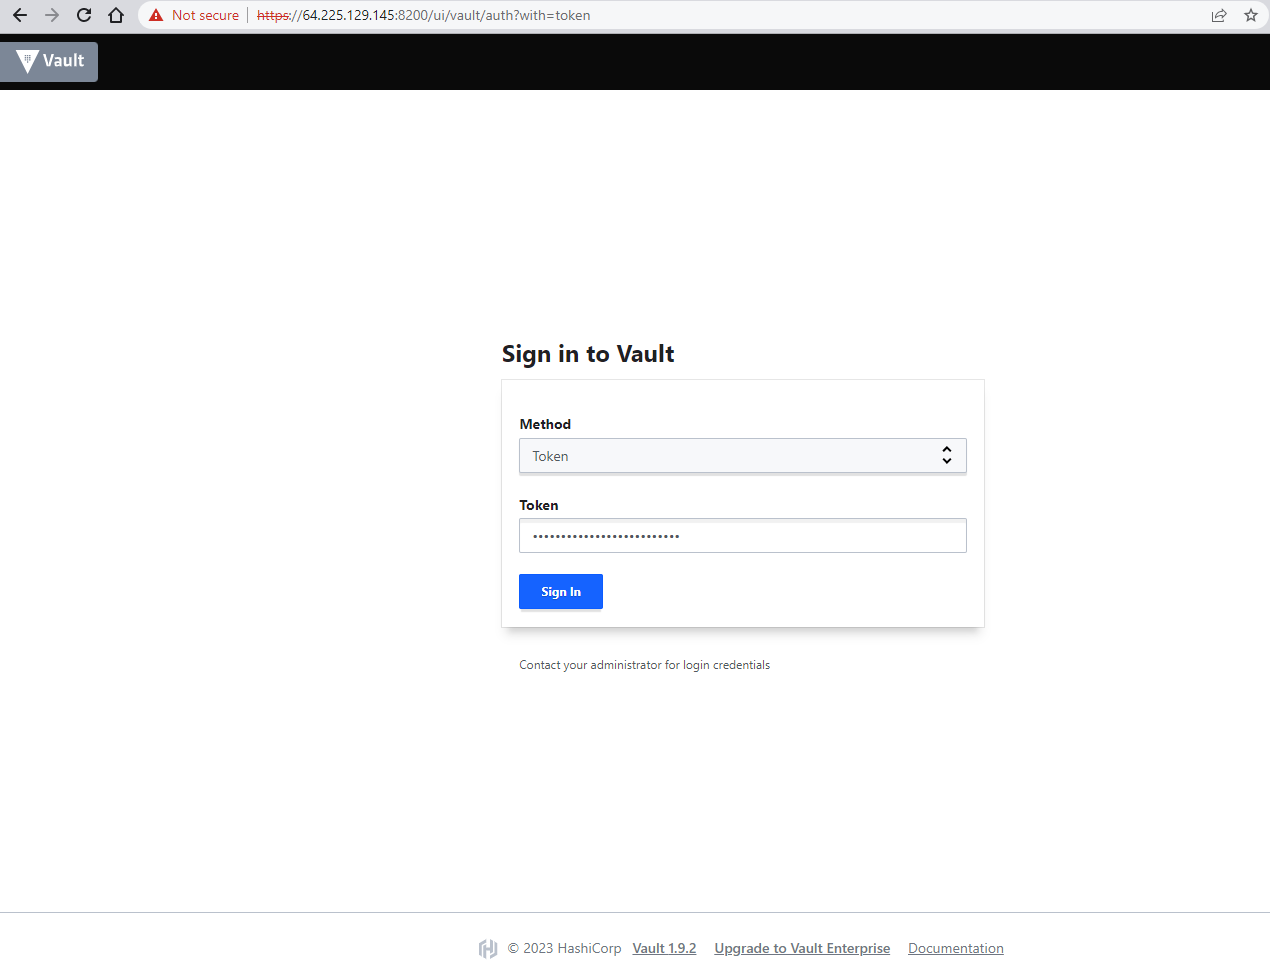
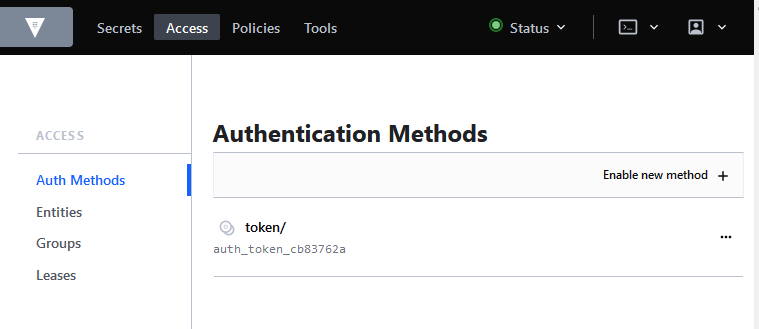
You can now start using the Vault.
Return livenessProbe to production value
livenessProbe in Kubernetes is time in which the system checks the health of the nodes. That would normally not be a concern of yours but if you do not unseal the Vault within that amount of time, the unsealing won’t work. Under normal circumstances, the value would be 60 seconds so that in case of any disturbance, the system would react within one minute instead of six. But it is very hard to copy and enter three strings under one minute as would happen if the value of 60 were present in file vault-values.yaml. You would almost inevitably see Kubernetes error 137, meaning that you did not perform the required operations in time.
In file vault-values.yaml the following section defined 360 seconds as the time for activating the livenessProbe:
livenessProbe:
  enabled: true
  path: "/v1/sys/health?standbyok=true"
  initialDelaySeconds: 360
To return the value of livenessProbe to 60, execute the command:
kubectl edit statefulset vault -n vault
You can now access the equivalent of file vault-values.yaml inside the Kubernetes cluster. The command will automatically enter a Vim-like editor so press the O key on the keyboard in order to be able to change the value with it:
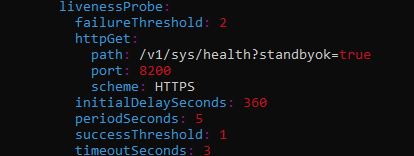
When done, save and leave Vim with the standard :w and :q syntax.
Troubleshooting
Check the events, which can point out hints of what needs to be improved:
kubectl get events -n vault
If there are errors and you want to delete Vault installation in order to repeat the process from a clean slate, note that MutatingWebhookConfiguration might be left in the default namespace. Delete it prior to trying again:
kubectl get MutatingWebhookConfiguration

kubectl delete MutatingWebhookConfiguration consul-consul-connect-injector
kubectl delete MutatingWebhookConfiguration vault-agent-injector-cfg
What To Do Next
Now you have Vault server as a part of the cluster and you can also use it from the IP address it got installed to.
Another way to improve Kubernetes security is securing applications with HTTPS using ingress:
Deploying HTTPS Services on Magnum Kubernetes in EO-Lab FRA1-1.