How to restore volume from snapshot on EO-Lab
In this article, you will learn how to restore volume from volume snapshot using Horizon dashboard or OpenStack CLI client.
This can be achieved by creating a new volume from existing snapshot. You can then delete the previous snapshot and, optionally, previous volume.
Prerequisites
No. 1 Hosting
You need a EO-Lab hosting account with access to Horizon interface: https://cloud.fra1-1.cloudferro.com/auth/login/?next=/
No. 2 A volume snapshot
You need to have a volume snapshot which you want to restore.
No. 3 OpenStack CLI client
If you want to interact with EO-Lab cloud using the OpenStack CLI client, you need to have it installed. Check one of these articles:
Once you have installed this piece of software, you need to authenticate to start using it: How to Activate OpenStack CLI Access to EO-Lab Cloud Using One- or Two-Factor Authentication
What We Are Going To Cover
Restoring volume snapshot using Horizon dashboard
Restoring volume snapshot using OpenStack CLI client
Restoring volume snapshot using Horizon dashboard
Navigate to the Volumes -> Snapshots section of the Horizon dashboard:
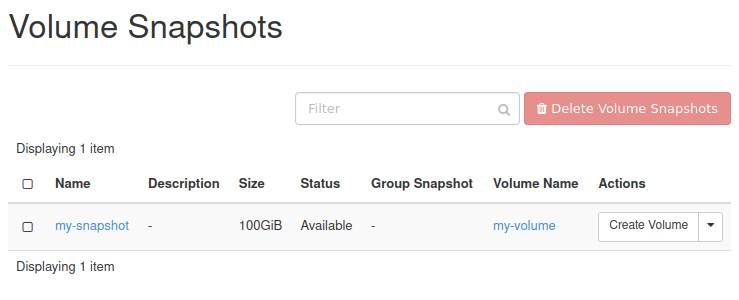
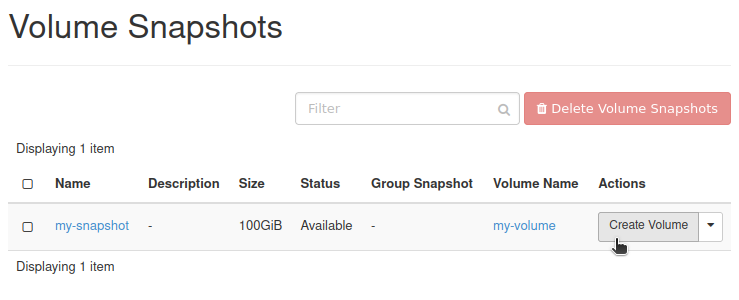
From the row representing the snapshot you want to restore, in the Actions column choose Create Volume:
You should get the window similar to this:
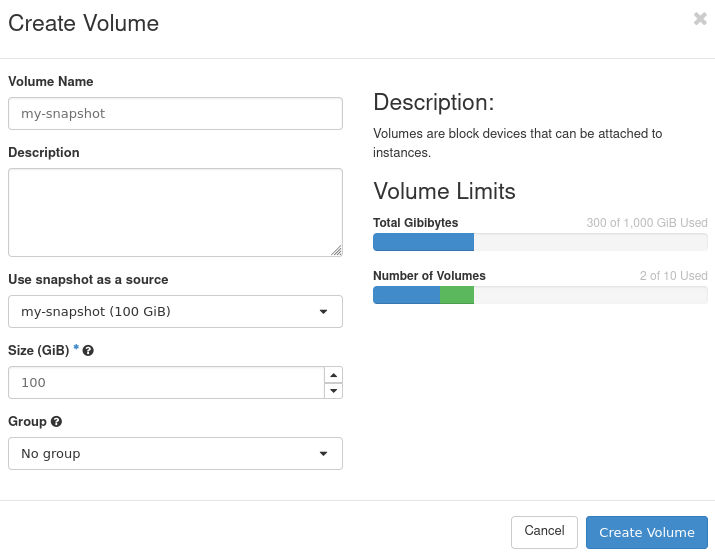
If you want your new volume to have a different name than your snapshot, enter the name of your choice in text field Volume Name.
In this example, we will name our new volume my-restored-volume.
Click Create Volume.
You should now be transferred to section Volumes -> Volumes of the Horizon dashboard. Your newly created volume should be there (in this example, its name was marked with a blue rectangle):
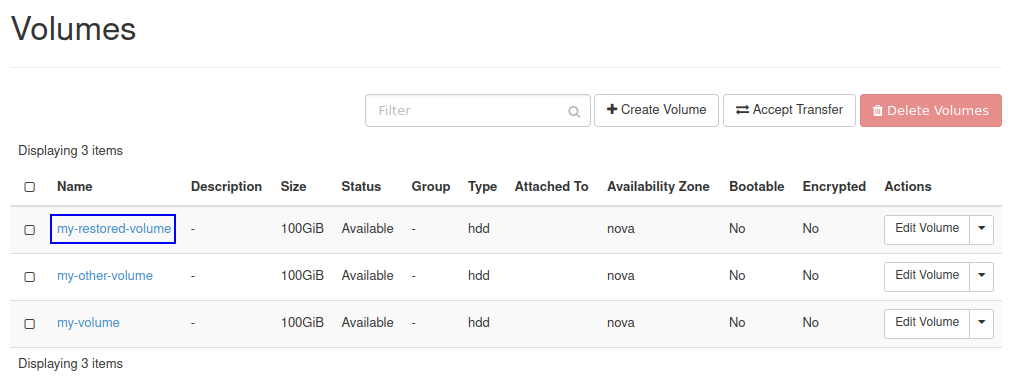
Make sure that the volume has the following Status: Available.
Restoring volume snapshot using OpenStack CLI client
Execute the following command:
openstack volume snapshot list
You should see the list of snapshots of your volumes:

Write somewhere down the ID of the snapshot from which you want to create a volume:
In this example, we want to restore the snapshot called my-snapshot. Its ID, marked on screenshot above with a blue rectangle, is d0f384be-3e61-49a4-8742-70929d22032e
To create a volume from your snapshot, execute command below, after replacing values as instructed.
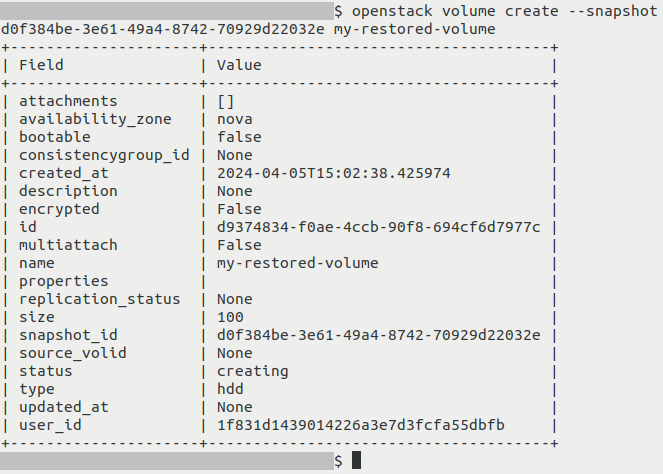
openstack volume create --snapshot d0f384be-3e61-49a4-8742-70929d22032e my-restored-volume
Replace:
d0f384be-3e61-49a4-8742-70929d22032e with the ID of your volume snapshot
my-restored-volume with the name you want to give to your new volume
You should get output similar to this:
List volumes:
openstack volume list
Your new volume should now be on the list:

Make sure that newly created volume has the following Status: available.
What To Do Next
You can now connect your new volume to a virtual machine and/or delete the previous one.
The following article includes information how to connect a volume to a virtual machine: How to move data volume between VMs using OpenStack CLI on EO-Lab
To learn how to delete a volume snapshot, see this article How to create or delete volume snapshot on EO-Lab
Volume you’ve just created can also be migrated to another project on the same cloud. This can be done by following one of these articles: