Using the ESA SNAP Processor on an EO-Lab VM
This tutorial covers launching SNAP processor / operator within python code using snappy, C2RCC is a processor for atmospheric correction and retrieval of water constituents from optical satellite imagery acquired by a variety of sensors. C2RCC is used as an example in this article, please feel free to read more about the processor itself under https://c2rcc.org/.
Prerequisites
No 1. Account
You need a EO-Lab hosting account with access to the Horizon interface: https://cloud.fra1-1.cloudferro.com/auth/login/?next=/.
No 2. Virtual machine with Linux distribution and access to /codede repository
You need to operate a Linux distribution VM with access to the /codede repository. In this case we are going to use Ubuntu 22.04 LTS and connect to it via ssh protocol (more about this here: How to connect to your virtual machine via SSH in Linux on EO-Lab)
The flavour eo2.2xlarge is sufficient for installing ESA SNAP (even with all possible toolboxes), but more advanced processing may require stronger flavours (especially when it comes to RAM usage).
No 3. Successfully installed ESA SNAP on a Linux distribution VM
Installation of ESA SNAP on an EO-Lab VM
No 4. Successfully coupled ESA SNAP to Python on a Linux distribution VM
ESA SNAP processors
You can check available processors/operator by running:
/home/eouser/snap/bin/gpt -h
And then see the help of specified operator using it’s name (C2RCC in this example):
/home/eouser/snap/bin/gpt c2rcc.msi -h
Running C2RCC processor
Connect to the VM terminal via ssh.
Connecting to VM
ssh -i /path/to/your/key.rsa -p 22 eouser@<VM's floating IP>
Activate the virtual environment running the appropriate python version.
Activate Environment
conda activate py35
We will use nano to create our script:
Nano Installation
sudo apt install nano
Now, let’s create an executable Python file:
Create Python Script
nano skrypt.py
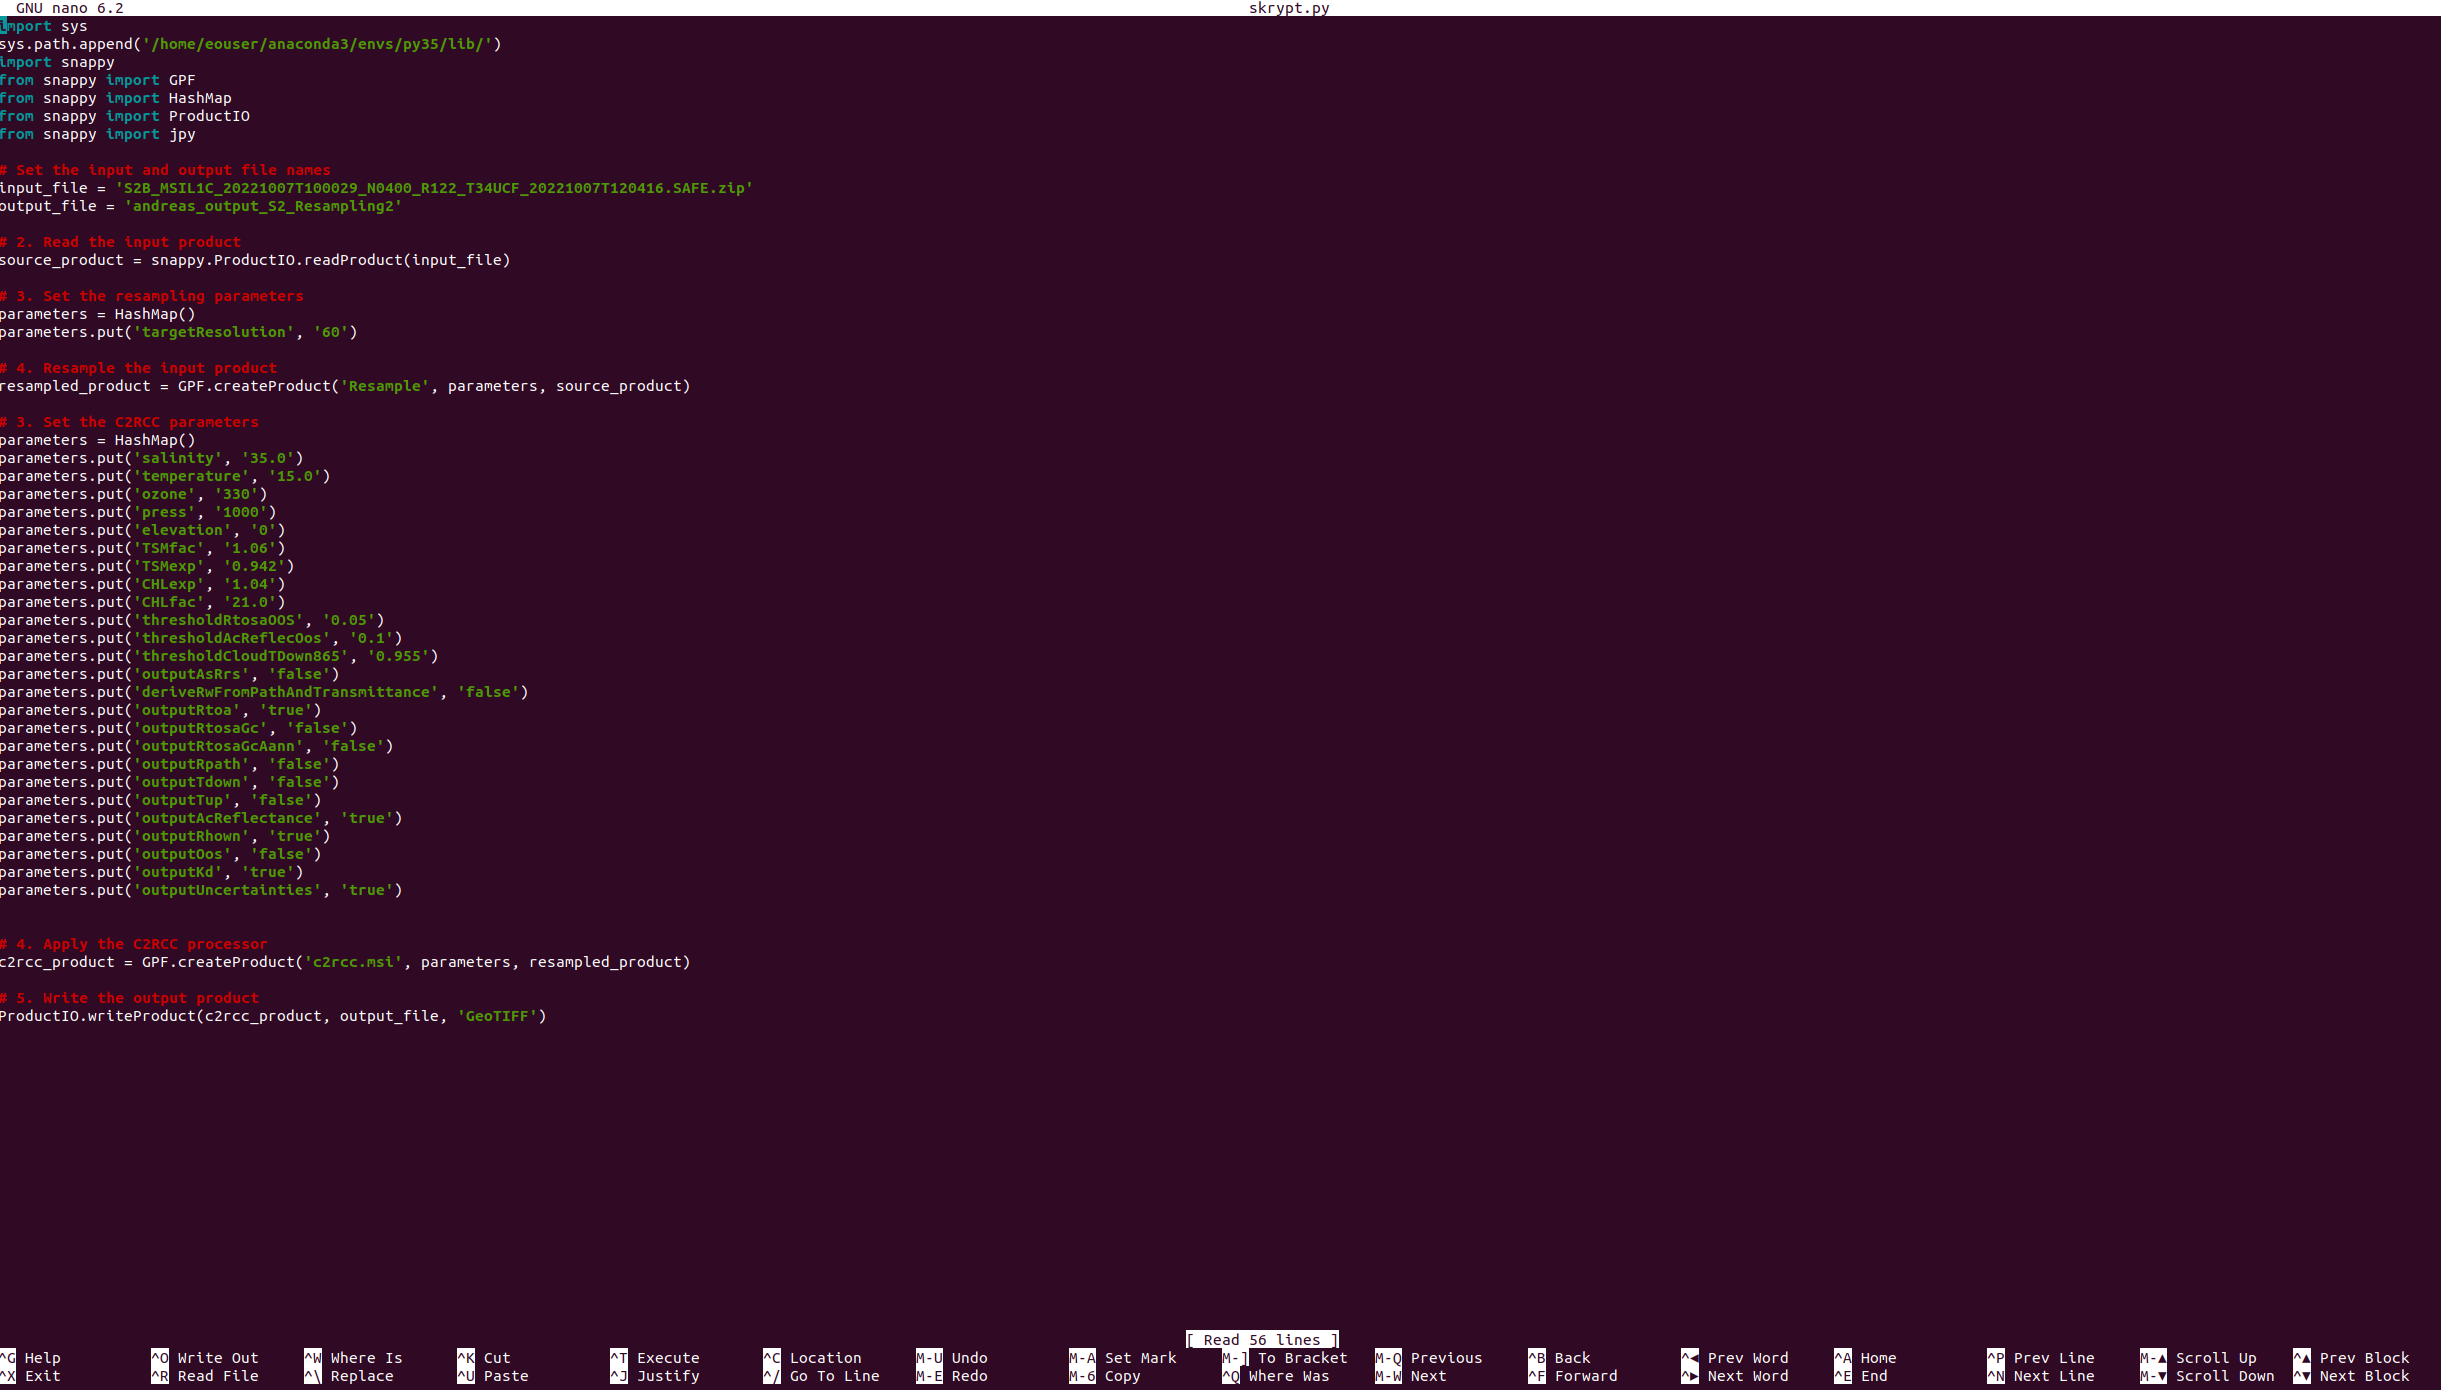
As file input, we will use prepared C2RCC code:
C2RCC Python Code
import sys
sys.path.append('/home/eouser/anaconda3/envs/py35/lib/')
import snappy
from snappy import GPF
from snappy import HashMap
from snappy import ProductIO
from snappy import jpy

# Set the input and output file names
input_file = '/codede/Sentinel-2/MSI/L1C/2023/04/29/S2A_MSIL1C_20230429T102601_N0509_R108_T32UME_20230429T141009.SAFE'
output_file = 'output_10'

# 2. Read the input product
source_product = snappy.ProductIO.readProduct(input_file)

# 3. Set the resampling parameters
parameters = HashMap()
parameters.put('targetResolution', '10')

# 4. Resample the input product
resampled_product = GPF.createProduct('Resample', parameters, source_product)

# 3. Set the C2RCC parameters
parameters = HashMap()
parameters.put('salinity', '35.0')
parameters.put('temperature', '15.0')
parameters.put('ozone', '330')
parameters.put('press', '1000')
parameters.put('elevation', '0')
parameters.put('TSMfac', '1.06')
parameters.put('TSMexp', '0.942')
parameters.put('CHLexp', '1.04')
parameters.put('CHLfac', '21.0')
parameters.put('thresholdRtosaOOS', '0.05')
parameters.put('thresholdAcReflecOos', '0.1')
parameters.put('thresholdCloudTDown865', '0.955')
parameters.put('outputAsRrs', 'false')
parameters.put('deriveRwFromPathAndTransmittance', 'false')
parameters.put('outputRtoa', 'true')
parameters.put('outputRtosaGc', 'false')
parameters.put('outputRtosaGcAann', 'false')
parameters.put('outputRpath', 'false')
parameters.put('outputTdown', 'false')
parameters.put('outputTup', 'false')
parameters.put('outputAcReflectance', 'true')
parameters.put('outputRhown', 'true')
parameters.put('outputOos', 'false')
parameters.put('outputKd', 'true')
parameters.put('outputUncertainties', 'true')

# 4. Apply the C2RCC processor
c2rcc_product = GPF.createProduct('c2rcc.msi', parameters, resampled_product)

# 5. Write the output product
ProductIO.writeProduct(c2rcc_product, output_file, 'BEAM-DIMAP')
The code above
imports necessary modules from the SNAP Python API,
sets the input and output file names,
reads the input product from the specified eodata Sentinel-2 product path,
resamples it to a target resolution of 10 meters (the higher the resolution – the longer the time of script execution), and
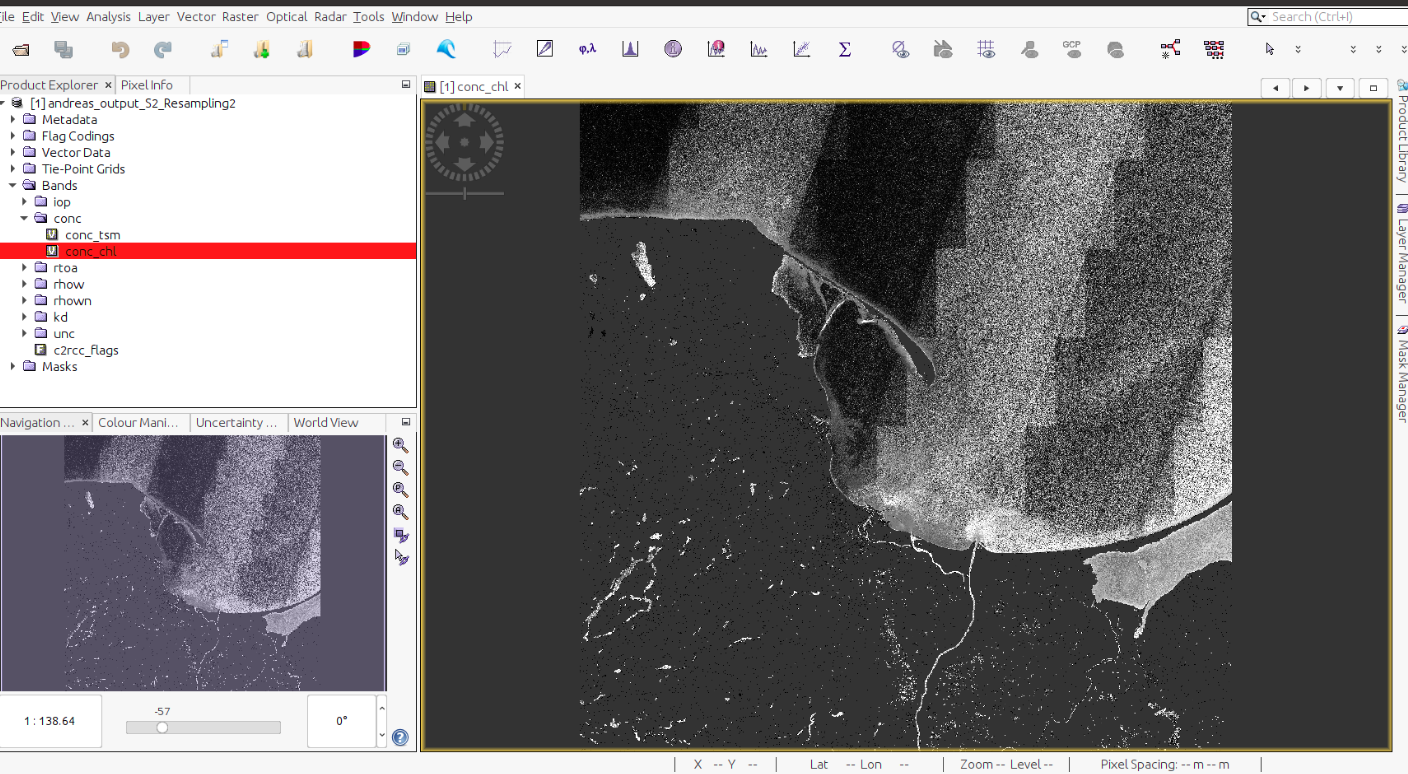
applies the C2RCC processor to derive water quality parameters.
First, the input file path and output file name are defined. Then the snappy.ProductIO.readProduct() method is used to read the input product into the source_product variable. Next, resampling parameters are set, including the target resolution, using a HashMap. The resampling operation is carried out by calling the GPF.createProduct() method with the ‘Resample’ operator name, the parameters, and the source_product as inputs. The resulting resampled product is stored in the resampled_product variable.
The HashMap is then cleared and new parameters for the C2RCC processor are set, including water properties such as salinity, temperature, and ozone, as well as processing flags to control output types. The GPF.createProduct() method is called again with the ‘c2rcc.msi’ operator name, the parameters, and the resampled_product as inputs to apply the C2RCC processor. The resulting product is stored in the c2rcc_product variable.
Finally, the ProductIO.writeProduct() method is used to write the c2rcc_product to an output file in BEAM-DIMAP format, using the output_file name. We suggest using it as instead of GTIFF because of filling virtual bands with zeros.
Paste your the code and save the file by pressing in turn ctrl+X, Y and Enter:
Then run it via “py35” Python. The process will start.
Warning
Before executing the Python script (skrypt.py), please be aware that the processing time may be substantial and could potentially take several hours to complete.
Execute Python Script
python3 skrypt.py
Downloading the output
As the processing output format has been selected as BEAM-DIMAP, obtaining it will require a bit more effort than in the case of GeoTIFF format. The BEAM-DIMAP format is based on the Hierarchical Data Format (HDF) and is designed to store multi-dimensional arrays of scientific data along with relevant metadata. It includes a header file containing metadata, such as geolocation information, instrument characteristics, and acquisition parameters, as well as a data file containing the actual image data. As this is a multi-file format, we need to download:
.dim file
.data directory
The .data folder should be compressed before downloading.
Compression of Directory
sudo apt install zip # install zip if necessary
zip -r example.zip <directory name>.data
and download files by locally executing the following commands:
Transfer Data
scp -i /path/to/your/key.rsa eouser@<VM's floating IP>:/path/to/dim/file.dim /destination/folder/path/

scp -i /path/to/your/key.rsa eouser@<VM's floating IP>:/path/to/compressed/data/directory/example.zip /destination/folder/path/
Decompress example.zip file into directory where .dim file is stored. That’s it, output of C2RCC is ready to be used on your local machine: